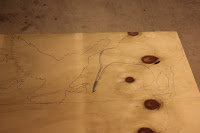
It feels like the Happy Valley Tip Shop is my second home recently. I love the place; there is so much cool stuff that has been salvaged from the landfill that they will give away for a couple of dollars. On my latest trip there I managed to purchase some recycled timber pieces I thought ideal to build a shelf out of.
Earlier this year, a generous Auntie needed to find a new home for her previously treasured Early Childhood Education (E.C.E.) books. They were offered to my partner Shellie as she is currently studying E.C.E. and so two big boxes of books ended up in our house taking up floor space.
The timber from the tip, as well as some leftover pieces of decking timber from around the property were the perfect materials to create some storage furniture for the books.
 |
| Decking timber from around the property, it is a bit green. |
 |
| Timber from the tip shop. |
The timber needed some prep work, cutting to the correct lengths and sanding down certain areas. The decking timber had previously been used as a deck and was replaced, the old stuff which I used had a tinge of green to it from twenty years of moisture and mould buildup. This was sanded off with a belt sander pretty easily.
 |
| RYOBI electric belt sander. |
While I'm showing off tools, below are my RYOBI tools that I have purchased recently. They are a fairly expensive purchase, yet are hard wearing, and a long lasting investment.
 |
| Battery and charger. |
 |
The bag can holds some tools, I have four batteries, an impact driver, a jigsaw, a multi-tool, and a radio.
Also seen here are a sharp saw, and a measuring tape. Both essential to a handy-man's toolbox. |
I began to cut the pieces to their correct lengths with saw. I follow the old adage that my dad has told me time and time again, "Measure twice, cut once".
 |
The small pieces of decking timber will hold the sides together, and will have the shelves nailed to them.
The earmuffs and visor keep me safe from loud noises, from powertools, and even hammers. The visor protects my eyes and face from projectiles e.g. splinters. |
Each of the two sides of the bookshelf were created by nailing joining three lengths of decking timber together as one solid piece.
 |
| The two bookshelf sides. |
Two saw horses helped to stand the two sides up while I nailed the shelves to them.
 |
| How to join it all together. |
Seen here is the final shelf. This was an easy project that took only a couple of hours. If you have a lot of belongings with nowhere to put them, or are striving for a tidier house, this is an easy piece that can serve your needs.
 |
| The finished shelf |
Does it look like recycled timber? Yes. Does it serve its purpose? Yes. It does what we need it to, as students we are looking for practicality. We don't need to own expensive brands of furniture to give us a certain financial status, we are content with practicality. The aesthetic of the book shelf is simple, clean, and functional. There is some textural beauty in the corrugations of the decking timber. These were sanded with the belt sander, giving the tops of the corrugations a clean and not green, fresh timber look, but this is contrasted with the dips in the wood which still show the old, dark, weathered timber. These little details appeal to me. I find that recycling of materials into something practical is beautiful.
 |
| The book shelf is full. |
There is one more thing I would like to do to this book shelf, in accordance with my manifesto, and that is to inscribe into the wood the origin of the materials, as far back as I know; and the processes that these materials undertook in becoming the bookshelf you see now.
The timber shelves would have a history to them, a past life, a purpose for which they were previously used for. As for the decking timber, it knows twenty years of family life; twenty summers of family BBQ's and childhood adventure; twenty winters of rain, wind, and sometimes snow. These stories are something I would like to celebrate in the creation of this book shelf.
Job done. I no longer have education books all over the floor.


