Showing posts with label Experience. Show all posts

Wednesday, 12 April 2017

Creating a Barrel Swing

My fiance Shellie has an incredible passion for her job as an early childhood teacher, her area of expertise is the outdoors and how children interact with outdoor spaces.

She had an idea of creating a big barrel swing, and sourced a big blue barrel as a starting point.

Once brought home to the forge we took it into the workshop dungeon to carve with the Jigsaw. First we took one of the ends off, this created a space where the children could crawl into. We then cut a window into one of the curved edges of the barrel. This window allows the children to hang their legs out of the barrel, to see out of the barrel, or even climb through into the barrel, and allowed the children to create the swinging motion by pushing against the ground..
Shellie cutting the front window out of the swing.

The next step was to drill four holes into what would be the top of the swing, rope will be tied through these holes so it can be hung securely at the Early Childhood Centre.
We also drilled a couple of holes in the bottom for the purpose of drainage.

Once we were happy with the shape of the swing we had to soften the edges. We scraped off as much of the rough plasctic shards as we could and then tried to sand the edges which clogged the paper, the next trick we tried was melting the edges so they were flat; we used a small blowtorch and guided the flame across the plastic edges this worked well.

Once at the Centre we used rope to suspend the swing. Using knots that would not slip or come undone we tied the barrel to hooks which were screwed into the platform above.

The swing in place at the centre.

The general reaction from the children at the centre was excitement at the new interactive piece of playground equipment, 

Wednesday, 26 October 2016

We Made a Veggie Garden!

Labour day brings us a Monday of work off and an excuse to either blob and do nothing for an extra day or to jam pack our weekend full of all of the things that we wish we had time to do but generally don't.
My fiancee Shellie and I chose the latter.
We like being busy creating things or going on adventures throughout our city and country. We decided Saturday we would wake up early and get straight to work in making a vegetable garden.
The basis of the garden; old pallet timber
We salvaged the old pieces of pallet timber from around the property to construct a box that would provide the basis of our garden.
Take note ladies, you too can get stuck in.
I had a simple design for a box in my mind and between us we brought it to life, we each wielded a hammer and got to work creating the box.
Wood slats on the bottom
Seeing as we were to put our new garden straight onto the lawn I decided that putting a bottom on it would contain the soil and plants in the box and also keep weeds from outside of the box from getting in.
Salvaging wood from old pallet scraps.
 We didn't have quite enough pieces of timber the right length to cover the entire bottom so I had to deconstruct some other pieces of pallets I had around to get all of the pieces needed.
The bottom covered
Giving the box the bottom not only acts as a container for the soil and plants, but also gives the rest of the box strength, by pulling it all together.
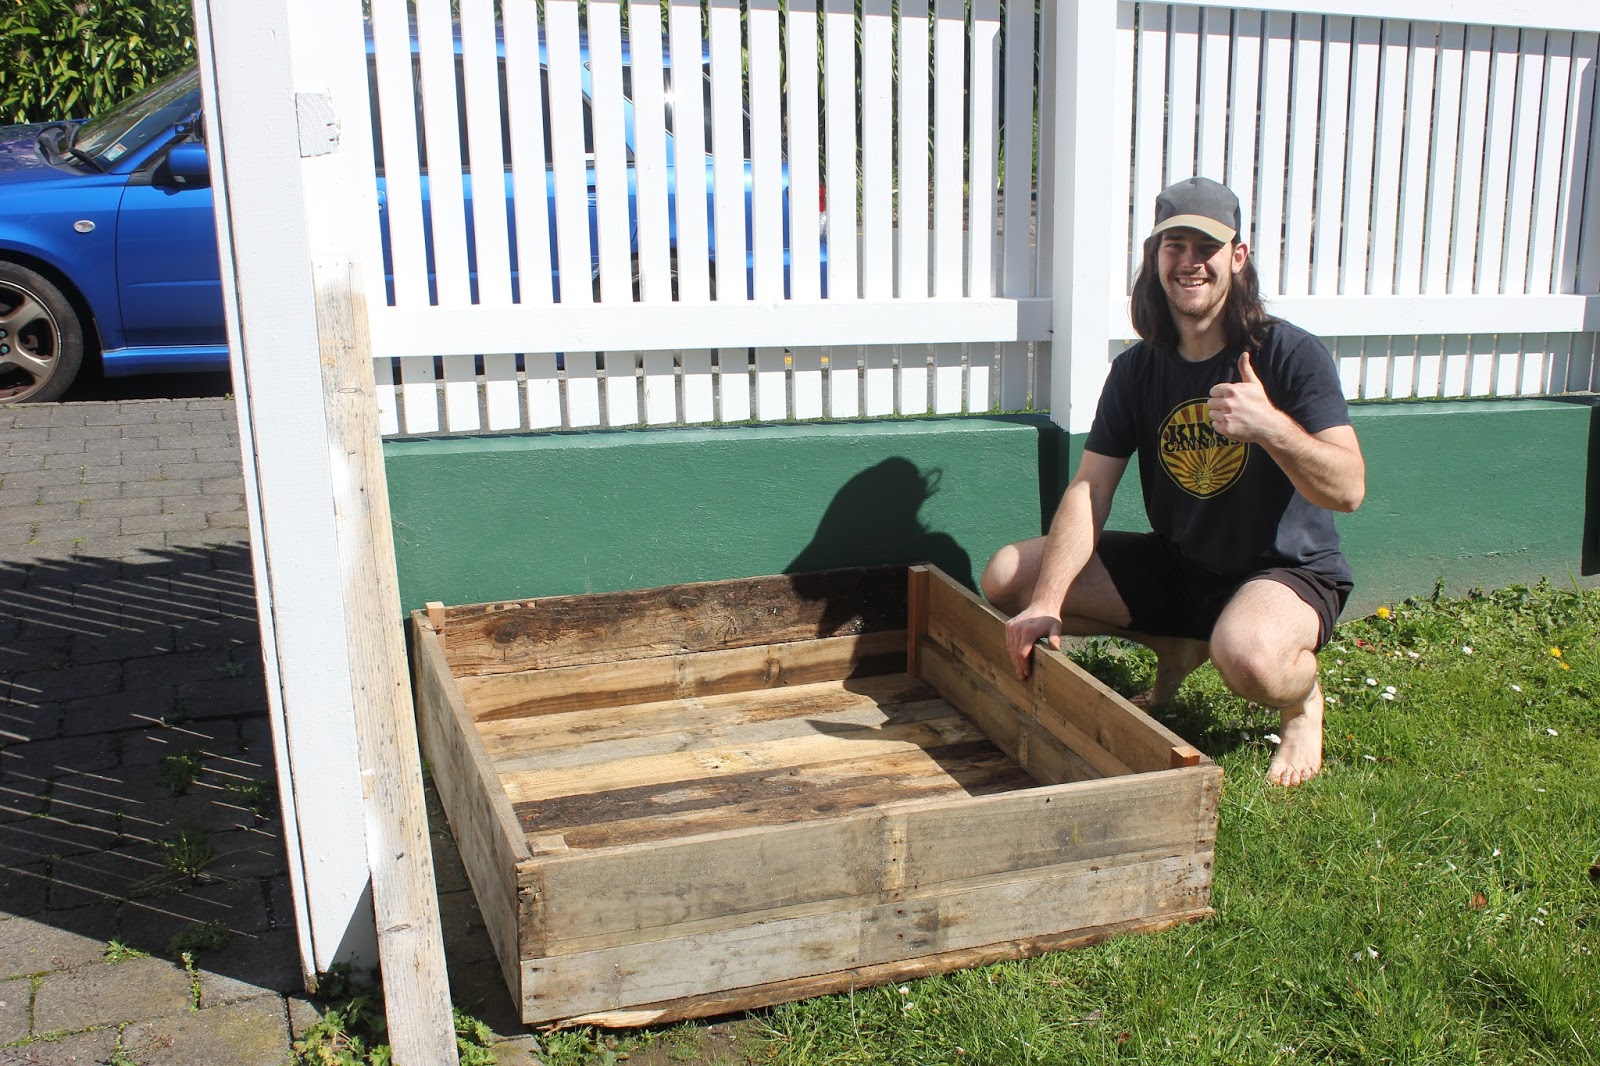
Our finished box
 The morning's job was over, we had completed the box construction, after lunch we would get to planting some veggies.
The garden box in its final resting position, unobtrusive and situated for morning sunshine.
We have been flatting in Wadestown at the forge, for the better part of this year, and have consistently been adding to a compost bin that was here on the property when we moved in. Over the course of six months we have been adding our food scraps and grass clippings to the compost bin and given a mix every now and then. The result of six months of being fed and breaking down, is beautiful soft soil that can now be used for our garden, hopefully to yield a good bunch of vegetables (at least enough for a salad).
The black compost bin stays out of the way
Inside is a mix of soft soil and the plant matter that will break down into it.
It took a few trips of carting buckets back and forth from the compost bin to our garden in order to fill it up. It also became hard to dig the soil out from the bin, fortunately these compost bins do not have a bottom so they can be pulled up and over from around the soil, this made things a lot easier.
The box filled with soil and divided into 9 equal sections.
By dividing the garden into sections we made it easier to keep track of the plants we will plant, one square for each species.
Constructing a frame for bean vines to climb
We had purchased some bean plants which grow in the form of a vine, in order for these to grow properly we had to construct a frame which could then have string hanging from it.
Stringing the frame so the plants can climb up
We planted a bunch of different plants including beans, tomatoes, carrots, capsicum, cucumber, lettuce, and also marigolds. The marigolds are said to repel moths and other insects; hopefully this means that when our vegetables grow they will not be eaten by bugs but be in tact for when we want to eat them.
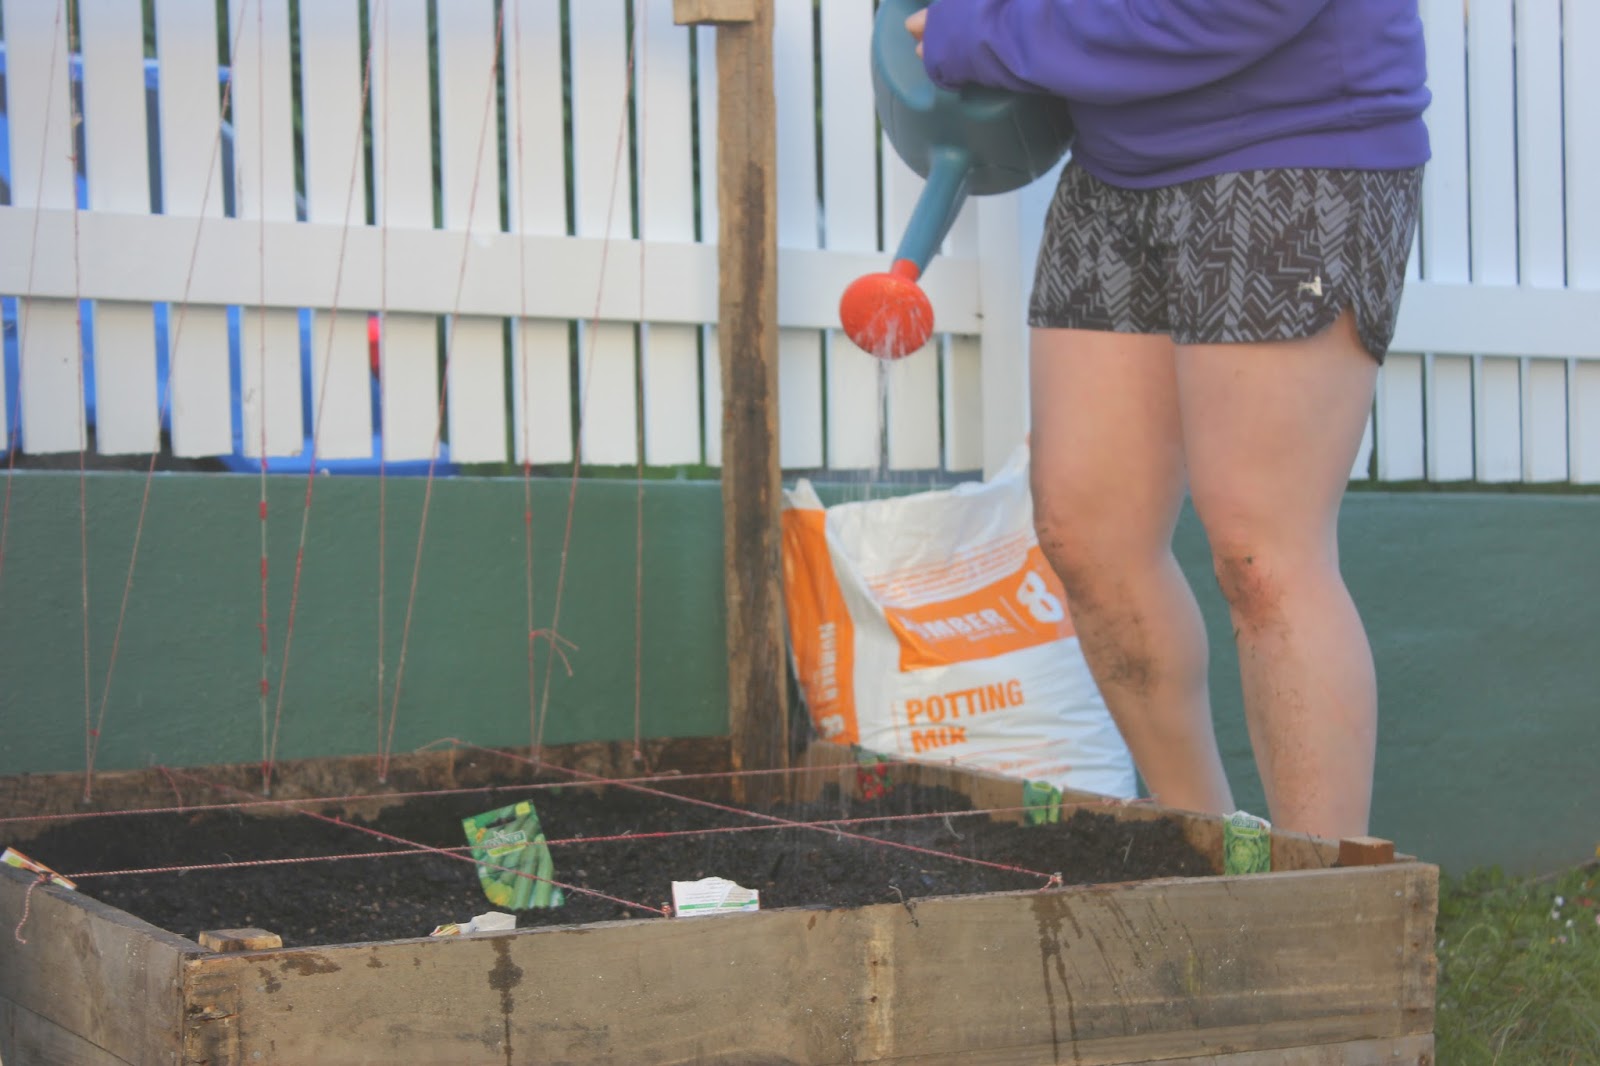
Watering our plants for the first time.
We watered all of our plants for the first time, something we will continue to do, especially on hot summer days. Watering is best done at dawn and dusk, when it is the right temperature to allow the plants to absorb the water without the sun evaporating it.
Gardener Jayden: American Gothic impression
And of course, the best way to celebrate a job well done is by posing in a few silly photos. Behind these two silly poses I was sincerely stoked with what we had accomplished in a day. It is about time I starting taking part in gardening, something I think is so central to sustainable living.
Gardener Jayden: Rocking out with a rake.
Gardening is a fantastic hobby to have. It requires hard work, care, and patience. Just like hunting and farming it allows people to appreciate where their food comes from. Through consistent care of your garden you will reap the benefits of nutritious food to sustain your own body; you will also know exactly what has gone into the soil to create your food, it is your decision whether or not you use pesticides or fertilizers to enhance your plants growth (ideally not), I believe a garden needs good soil, plenty of sunlight and a little bit of water to encourage the best growth.

That's it.

Put simple things in to get the best things out. I hope. I'll tell you how it works out at the end of summer.

Monday, 20 June 2016

Building a Wardrobe.

When we moved into our flat in Wadestown, Shellie and I claimed a large bedroom, the only problem was it didn't have any storage space. For the first while it was quite a mess. We moved a couple of shelving units into a spare bedroom down the hall and hung all of our clothing in a wardrobe down the hall that wasn't being used, this was less than ideal but worked nonetheless.

In the months following I came up with ideas on how to optimize the space in our bedroom and to contain our stuff. One of these ideas was to build a wardrobe that would live in our room and not down the hall.

Over the next few weeks I constructed a wardrobe that would fit our needs. It would be over 1 meter wide and tall enough to house two bars full of clothes.

I had the help of my friend Adam, and Shellie also helped out.
1900mm X 600mm.
One solid wall piece.


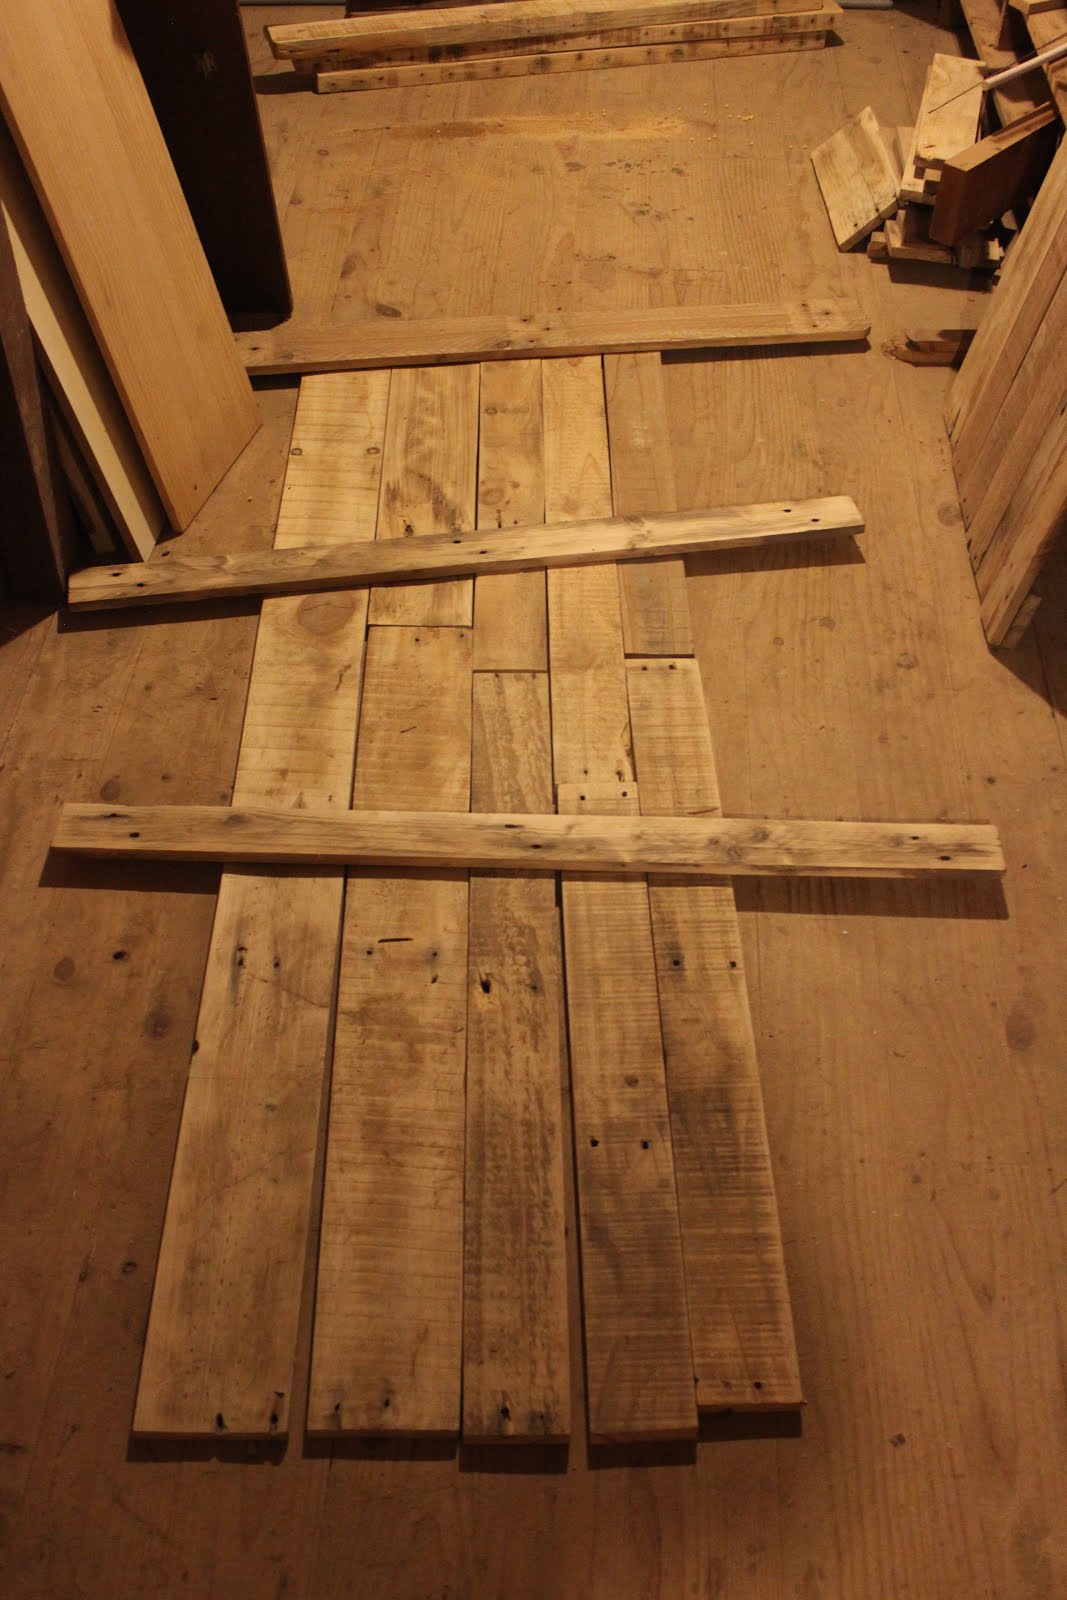
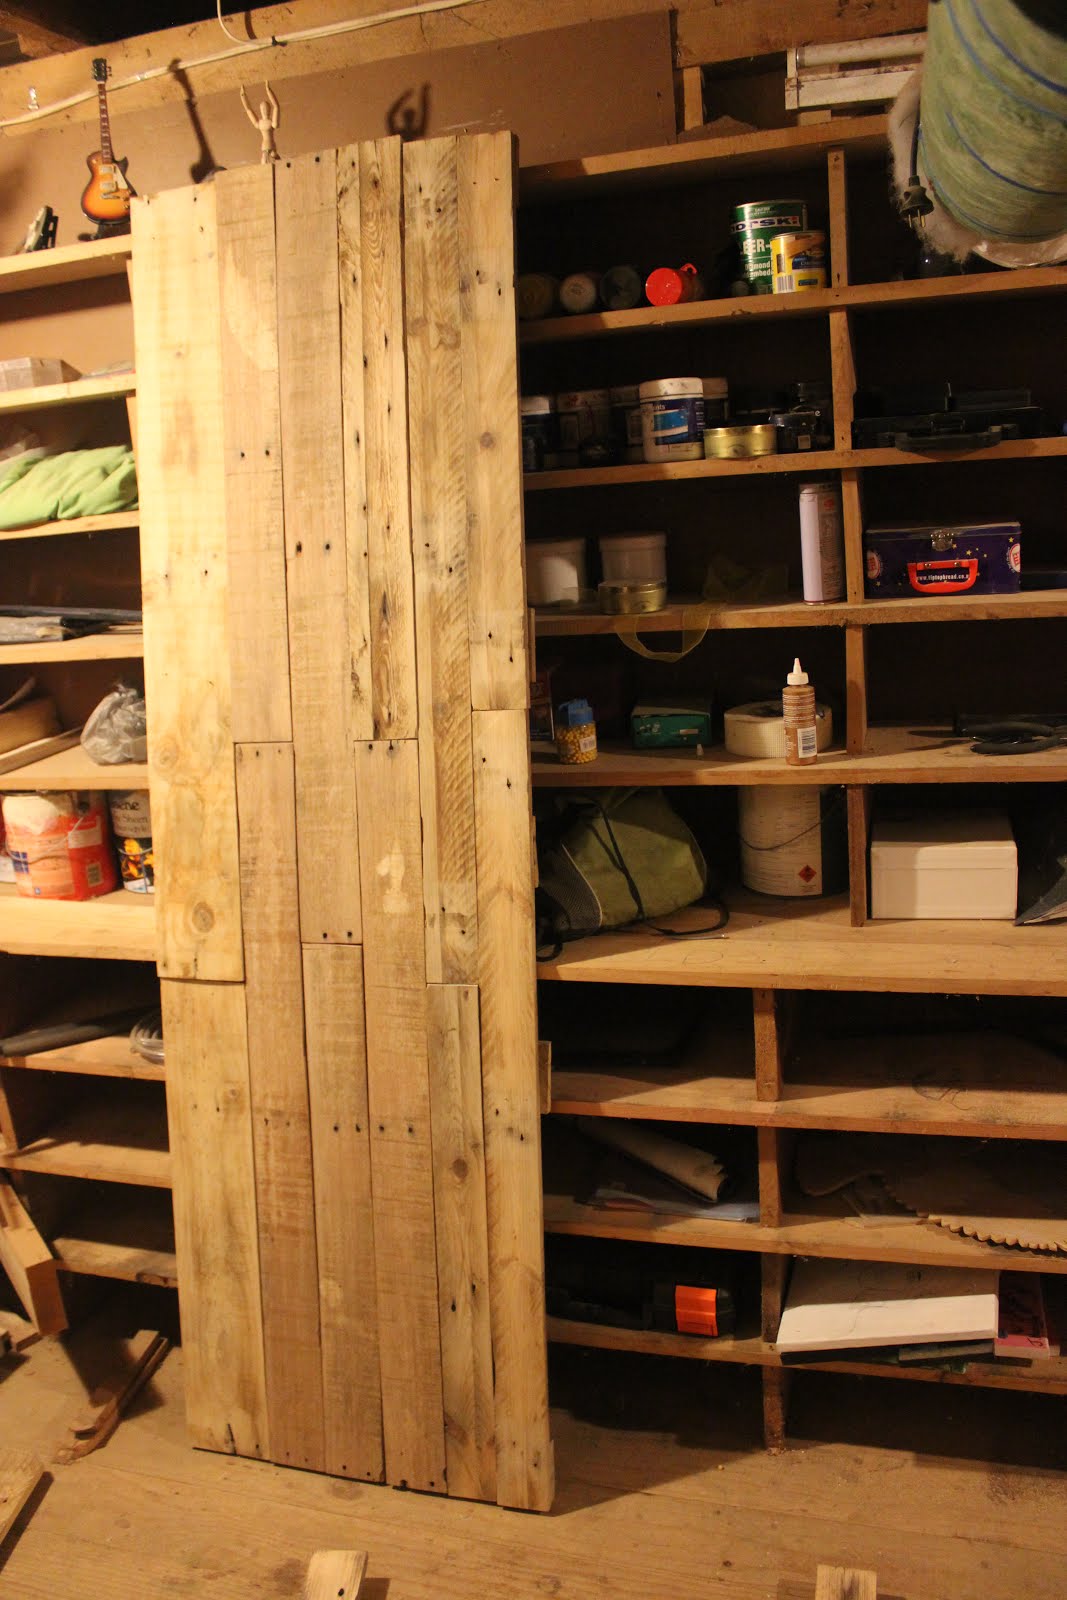
After completing construction of the guitar stand Adam and I set to work on creating the wardrobe walls. Using sanded down pallet wood we measured and cut the timber, laying it out so it was 1900mm tall and 600mm wide. We used five other pieces of timber to screw to the laid out pieces, thus forming one solid wall piece. This was harder than we initially assumed it would be as our pallet timber was imperfect, bowed slightly in places, and not all the same thickness, this meant an inventive and rough technique was needed to force the timber together in places before screwing it all together so that it aligned neatly.

Over the next few weeks I finished off the second wall; I cut in half a steel beam to create two smaller beams of even length; and I made both a top and bottom base which the two walls would sit in and be attached, this I achieved by nailing four 4X2 pieces together much the same way as I had for the guitar stand.
Before lining it all up I used my jigsaw to cut out gaps where the two beams could slot in; this was an error of judgement as I hadn't made an allowance for the top base which had an overhang that covered the gap. This cost me time in cutting a new piece of timber and a new gap.

Lining it all up


Top base overhanging the gap for the beam.
Before nailing the walls to the bases and constructing the wardrobe as a complete piece of furniture I needed to make it pretty and safe. A lot of the screws I had used were longer than the wood was thick so they stuck out dangerously. Being the safety buff as I am I needed to find a way to remove them. I called Adam over and he provided me with an angle grinder which he taught me how to use. The two of us took turns removing any sharps from the two walls, using the correct protective gear. Safety glasses for our eyes and earmuffs for our ears. The grinder is a dangerous tool and we had to clear the area from anything that could catch on fire from the sparks, a perk of having a friend who is a volunteer fire fighter in has spare time.
Adam taught me how to use the Angle Grinder


We removed sharps from the two walls.


We cleared the works bench of things that could catch on fire.
That evening I brought the pieces of wardrobe into the bedroom, I couldn't construct it elsewhere in the house as it wouldn't fit through the hallways very easily. Shellie helped to hold the walls steady while I nailed the pieces together. when the box was completed with the two bars inserted into their gaps I assessed the wardrobe, it had quite a bit of movement, so I cut and sanded down two braces to cross the back of the wardrobe, these stabilize the whole wardrobe, stopping excessive movement.

Shellie helped me by holding the walls still.
The two back braces stabilized the wardrobe.


The finished wardrobe fit the corner of our room snugly. The next night I took delight in filling it with our clothes. Now we no longer have to walk the length of the house to pick out the next days clothes. 
Our new wardrobe filled with clothes.
Creating a wardrobe from nothing but pallets was an exciting opportunity to learn some new D.I.Y. techniques, to learn how to use tools I haven't explored before, and to add another piece how furniture to our room that tells a meaningful story that purchasing an ugly plastic rack never could. By reworking old materials into something new I am adding my work and my daily life to the wardrobe. I am creating a new history for materials that already have a prior history, to me that is fascinating.

I don't know exactly where this timber came from originally but I can decide where it will end up after I am finished using it during my time flatting. Likely it will be used again as a wardrobe by someone else, taking with it the history of its creation and my use of it.

Wednesday, 27 April 2016

De-Construction of Pellets

With Valley Rovers as a fundraiser we decided to split wood and sell it on. While the wood dried it sat on a bunch of pellets which I got for free by asking nicely at the Dominion Post. As we have started to sell our wood and the pellets have freed up I have been able to take the pellets and make use of them.

I brought them back to our flat and tried a bunch of ways to deconstruct them. The videos below showed a couple of ingenious ways to take pellets apart without destroying the timber. I tried a couple of these methods but they were a bit  hit and miss.
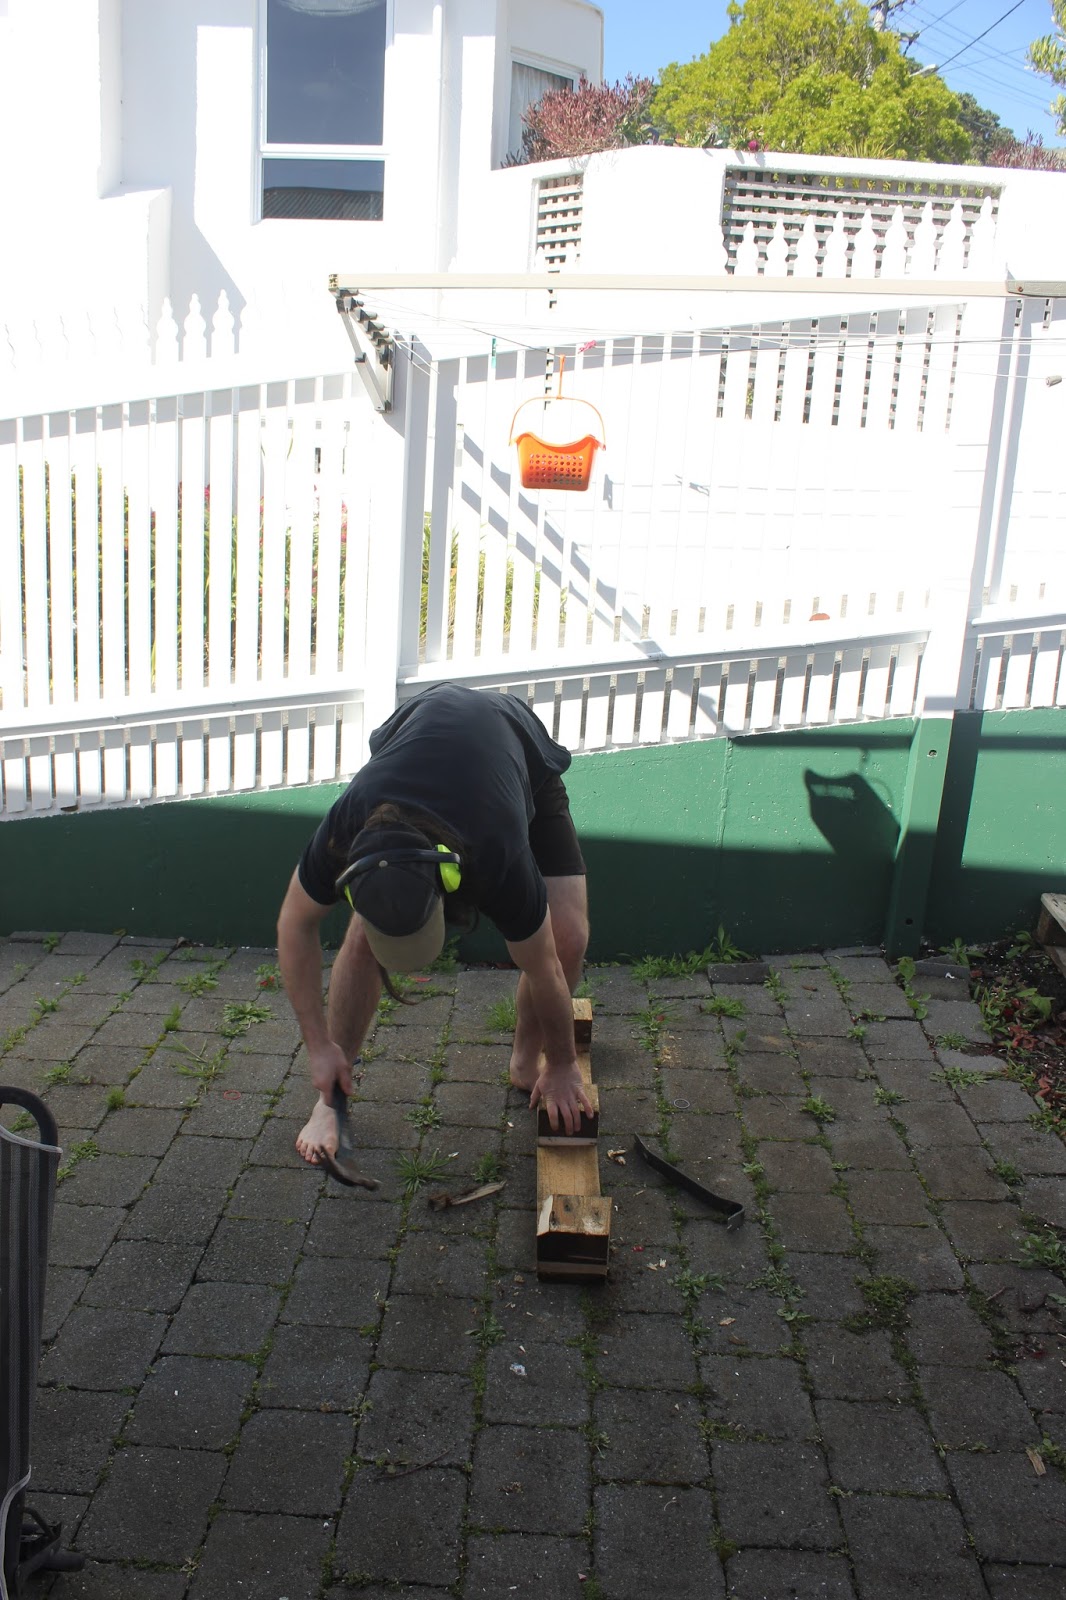
I eventually told a mate of mine who in turn lent me his Stanley Wonder Bar Crowbar. This paired with a hammer did the trick. (Ear muffs were a must for deconstruction).

Stanley Wonderbar - as seen on Amazon.
I deconstructed pellets so as to make new stuff. I have a variety of projects in the line that require a large amount cheap timber, pellets are ideal for this, in my case they are free (apart from transport costs) it just require some time to deconstruct them and make them pretty.

Heres some videos I watched.

This video is a striaght up deconstruction video done with a hammer.
https://www.youtube.com/watch?v=ZtPmUZ-k3aI

This video shows an inventive method using the weight of bricks to seperate the timber.
https://www.youtube.com/watch?v=O7oWaRPpdKU

This video offers a range of methods that didn't apply to me, and is very safety conscious. But still a good watch.
https://www.youtube.com/watch?v=thAsa9jE2QQ

Heres the tools I used.
Hammer - any old hammer will do
Stanley Wonder Bar Crowbar - as seen above
Brush - mine is a wooden handled brush that came paired with a steel shovel, perfect for cleaning the dust and wood shavings off the timber and the floor.

A pile old pellets - yet to be turned into beautiful fresh timber.
Once the timber was separated out I used my claw hammer to remove any nails left in the timber. Sometimes the old rusty nails would snap off in the timber so for safety and the integrity of the timber I had to punch them deeper into the timber using another nail as a nail punch.

http://www.justagirlblog.com/how-to-install-a-pallet-wall-part-1/
The timber needs to have nails removed carefully to ensure its integrity.
The next step is to sand the timber. This strips the surface layer from the wood, revitalizing it and making it seem new again. I borrowed two electric sanders for this job. The first is the belt sander that rips off the old and used top layer of timber. I try not to rip too much off so the timber to give the timber the desired rustic look so people can see that the wood has already lived and served a purpose.

The timber is clamped down while I strip it using the belt sander.
http://www.skibuilders.com/phpBB2/viewtopic.php?t=810
Some timber given a rough sand.

Now that the timber is fresh, revitalized, ready to use I have to come up with a few projects with which I can use the timber. The first thing I wish to make is a wardrobe, as our current room in the flat doesn't have one. Other projects I wish to do with recycled timber include a guitar rack, and a book shelf.

4X2 planks salvaged from pallets and sanded down
A plank salvaged from a pallet. Nails removed and sanded down.
Now to make something, check out next weeks upcoming post to see what project I do first.

Wednesday, 2 September 2015

Making a Bookshelf out of scrap.

It feels like the Happy Valley Tip Shop is my second home recently. I love the place; there is so much cool stuff that has been salvaged from the landfill that they will give away for a couple of dollars. On my latest trip there I managed to purchase some recycled timber pieces I thought ideal to build a shelf out of.

Earlier this year, a generous Auntie needed to find a new home for her previously treasured Early Childhood Education (E.C.E.) books. They were offered to my partner Shellie as she is currently studying E.C.E. and so two big boxes of books ended up in our house taking up floor space.

The timber from the tip, as well as some leftover pieces of decking timber from around the property were the perfect materials to create some storage furniture for the books.
Decking timber from around the property, it is a bit green.
Timber from the tip shop.
The timber needed some prep work, cutting to the correct lengths and sanding down certain areas. The decking timber had previously been used as a deck and was replaced, the old stuff which I used had a tinge of green to it from twenty years of moisture and mould buildup. This was sanded off with a belt sander pretty easily.
RYOBI electric belt sander.
While I'm showing off tools, below are my RYOBI tools that I have purchased recently. They are a fairly expensive purchase, yet are hard wearing, and a long lasting investment.
Battery and charger.
The bag can holds some tools, I have four batteries, an impact driver, a jigsaw, a multi-tool, and a radio.
Also seen here are a sharp saw, and a measuring tape. Both essential to a handy-man's toolbox.
I began to cut the pieces to their correct lengths with saw. I follow the old adage that my dad has told me time and time again, "Measure twice, cut once".
The small pieces of decking timber will hold the sides together, and will have the shelves nailed to them.
The earmuffs and visor keep me safe from loud noises, from powertools, and even hammers. The visor protects my eyes and face from projectiles e.g. splinters.
Each of the two sides of the bookshelf were created by nailing joining three lengths of decking timber together as one solid piece.
The two bookshelf sides.
Two saw horses helped to stand the two sides up while I nailed the shelves to them.
How to join it all together.
Seen here is the final shelf. This was an easy project that took only a couple of hours. If you have a lot of belongings with nowhere to put them, or are striving for a tidier house, this is an easy piece that can serve your needs.
The finished shelf
Does it look like recycled timber? Yes. Does it serve its purpose? Yes. It does what we need it to, as students we are looking for practicality. We don't need to own expensive brands of furniture to give us a certain financial status, we are content with practicality. The aesthetic of the book shelf is simple, clean, and functional. There is some textural beauty in the corrugations of the decking timber. These were sanded with the belt sander, giving the tops of the corrugations a clean and not green, fresh timber look, but this is contrasted with the dips in the wood which still show the old, dark, weathered timber. These little details appeal to me. I find that recycling of materials into something practical is beautiful.
The book shelf is full.
There is one more thing I would like to do to this book shelf, in accordance with my manifesto, and that is to inscribe into the wood the origin of the materials, as far back as I know; and the processes that these materials undertook in becoming the bookshelf you see now.

The timber shelves would have a history to them, a past life, a purpose for which they were previously used for. As for the decking timber, it knows twenty years of family life; twenty summers of family BBQ's and childhood adventure; twenty winters of rain, wind, and sometimes snow. These stories are something I would like to celebrate in the creation of this book shelf. 

Job done. I no longer have education books all over the floor.

Thursday, 6 August 2015

Constructing a flaming piece of art

I awoke Saturday morning, the 1st of August, my birthday.
I slowly stretched myself awake and climbed out of bed, dressed, fed myself, and then thought. Alright lets get to it.

The car was packed to the roof. We headed out towards the Petone Waterfront and with the help of a few volunteers unloaded the car.

The work didn't start on Saturday; I had been hard at work, preparing various shapes for the sculpture any chance I had throughout the week. Using the silhouettes seen in last weeks post I was able to project onto MDF the image I wanted, draw it on, and then using my jigsaw, cut it out carefully. There were ten shapes of various sizes that I cut out with the jigsaw.
Prep for the first layer.
The organizers from the Hutt Valley Rotary club first put up the bottom section of the tower, the basis of the sculpture. This required digging post holes in the sand of more than a metre deep, and moving the base structure into place. We secured the structure to a bottom pellet, and filled the holes in with sand.

It was time for our construction to begin.
We required five round tiers with a 600mmX620mm square cut out of them so they could fit around the tower and onto a shelf we had made using decking timber.
4 Metres tall
When the first two shelves were up we could erect the top part of the tower, and the scaffolding that would allow us to work on it.
We were told it would be four Metres high, It looked a lot higher when it was standing there waiting to be worked on.
Showing off a jigsaw cut shape: the fleur de lis painted in Scouting colours, as well as a sign with my name on it.
The rain came in and made the day a little miserable, however, work pressed on. We cut out, and set in place the last three round tiers.
We had a friend and scout Hannah helping us to paint the shapes before they were hung up.
Holes were drilled throughout the sculpture that would later be widened with the jigsaw for ventilation, more holes were drilled through each tier to allow the stringing of ropes and the suspension of animals and other shapes.
Setting the Stag in place.
While Chris, Shellie, and Peter strung up the suspended shapes I climbed atop the scaffolding and mounted the Stag, Alan, atop the tower in a position of supreme power over the rest of the Petone Carnival.
Inspecting the teams rope work.
The rain was still coming down and the tide had come in right up to the sculpture, We had finished construction, but we still had to pack up our wet gear, and tidy the site. After the tidy up we admired the sculpture a while before heading to the pub for a quick beer. The planned time of 6.30 was when the sculptures were to be lit.
The finished sculpture in the gloom of dusk as the tide comes in.
 
A much deserved drink  before the big light.

Upon returning to the beach we once more donned our fluorescent vests and walked the beach. Shellie took charge of coating the sculpture in diesel. An important job in the rain to ensure a quick ignition.
Diesel woman Shellie
 
The first sculpture is lit further down the beach.
When the first two sculptures were well underway with burning I was given control of the flame thrower and the task of igniting the sculpture was put in my hands.
I felt powerful with the flame gun, and within about a minute the sculpture was roaring to life, the flames battled their way through smoke and cardboard stuffing that filled the centre of the tower.
The animals were aglow with the light coming from the centre of the sculpture. The stag was shrouded in smoke, and as the fire burnt it fought its way up through the cardboard and engulfed the stag in flame, as it escaped the chimney.
Man with a flame thrower.

The smoking stag.

The whole sculpture on fire.

Originally the crowds were supposed to clear the beach and watch from afar, but within minutes of the first fire being lit the beach was full of eager bodies. When our sculpture went up the crowd surrounding it was huge, and it seemed to stay that way for the next half hour. Our hard work through the ick of rain and sand all day had paid off and people were basking in the heat of it, enjoying it.
The crowds observe the burning sculpture.
The flames went up and ate the sculpture from the inside out, we stood around guessing which animal shape would be the first to fall, snapping from its rope; surprisingly they all held very well. As it burnt on we watched in anticipation as the main supports burnt, eager to see the tower fall and crumple into a pile of flaming rubble. When it finally gave way the stag fell and crashed to the ground, on closer inspection he had smashed all of his legs and antlers off and was just a body. The fire crew scraped the large pieces into a large pile and we crowded together as it burnt on.
The flaming Stag.

The other animals warm up.

To me the whole day screamed success. I can't think of a better way to have spent my birthday, working hard on a project of passion, that the public admired, with my friends and family.
Me, the birthday boy.