Showing posts with label Achievement. Show all posts

Monday, 20 June 2016

Building a Wardrobe.

When we moved into our flat in Wadestown, Shellie and I claimed a large bedroom, the only problem was it didn't have any storage space. For the first while it was quite a mess. We moved a couple of shelving units into a spare bedroom down the hall and hung all of our clothing in a wardrobe down the hall that wasn't being used, this was less than ideal but worked nonetheless.

In the months following I came up with ideas on how to optimize the space in our bedroom and to contain our stuff. One of these ideas was to build a wardrobe that would live in our room and not down the hall.

Over the next few weeks I constructed a wardrobe that would fit our needs. It would be over 1 meter wide and tall enough to house two bars full of clothes.

I had the help of my friend Adam, and Shellie also helped out.
1900mm X 600mm.
One solid wall piece.


After completing construction of the guitar stand Adam and I set to work on creating the wardrobe walls. Using sanded down pallet wood we measured and cut the timber, laying it out so it was 1900mm tall and 600mm wide. We used five other pieces of timber to screw to the laid out pieces, thus forming one solid wall piece. This was harder than we initially assumed it would be as our pallet timber was imperfect, bowed slightly in places, and not all the same thickness, this meant an inventive and rough technique was needed to force the timber together in places before screwing it all together so that it aligned neatly.

Over the next few weeks I finished off the second wall; I cut in half a steel beam to create two smaller beams of even length; and I made both a top and bottom base which the two walls would sit in and be attached, this I achieved by nailing four 4X2 pieces together much the same way as I had for the guitar stand.
Before lining it all up I used my jigsaw to cut out gaps where the two beams could slot in; this was an error of judgement as I hadn't made an allowance for the top base which had an overhang that covered the gap. This cost me time in cutting a new piece of timber and a new gap.

Lining it all up


Top base overhanging the gap for the beam.
Before nailing the walls to the bases and constructing the wardrobe as a complete piece of furniture I needed to make it pretty and safe. A lot of the screws I had used were longer than the wood was thick so they stuck out dangerously. Being the safety buff as I am I needed to find a way to remove them. I called Adam over and he provided me with an angle grinder which he taught me how to use. The two of us took turns removing any sharps from the two walls, using the correct protective gear. Safety glasses for our eyes and earmuffs for our ears. The grinder is a dangerous tool and we had to clear the area from anything that could catch on fire from the sparks, a perk of having a friend who is a volunteer fire fighter in has spare time.
Adam taught me how to use the Angle Grinder


We removed sharps from the two walls.


We cleared the works bench of things that could catch on fire.
That evening I brought the pieces of wardrobe into the bedroom, I couldn't construct it elsewhere in the house as it wouldn't fit through the hallways very easily. Shellie helped to hold the walls steady while I nailed the pieces together. when the box was completed with the two bars inserted into their gaps I assessed the wardrobe, it had quite a bit of movement, so I cut and sanded down two braces to cross the back of the wardrobe, these stabilize the whole wardrobe, stopping excessive movement.

Shellie helped me by holding the walls still.
The two back braces stabilized the wardrobe.


The finished wardrobe fit the corner of our room snugly. The next night I took delight in filling it with our clothes. Now we no longer have to walk the length of the house to pick out the next days clothes. 
Our new wardrobe filled with clothes.
Creating a wardrobe from nothing but pallets was an exciting opportunity to learn some new D.I.Y. techniques, to learn how to use tools I haven't explored before, and to add another piece how furniture to our room that tells a meaningful story that purchasing an ugly plastic rack never could. By reworking old materials into something new I am adding my work and my daily life to the wardrobe. I am creating a new history for materials that already have a prior history, to me that is fascinating.

I don't know exactly where this timber came from originally but I can decide where it will end up after I am finished using it during my time flatting. Likely it will be used again as a wardrobe by someone else, taking with it the history of its creation and my use of it.

Thursday, 6 August 2015

Constructing a flaming piece of art

I awoke Saturday morning, the 1st of August, my birthday.
I slowly stretched myself awake and climbed out of bed, dressed, fed myself, and then thought. Alright lets get to it.

The car was packed to the roof. We headed out towards the Petone Waterfront and with the help of a few volunteers unloaded the car.

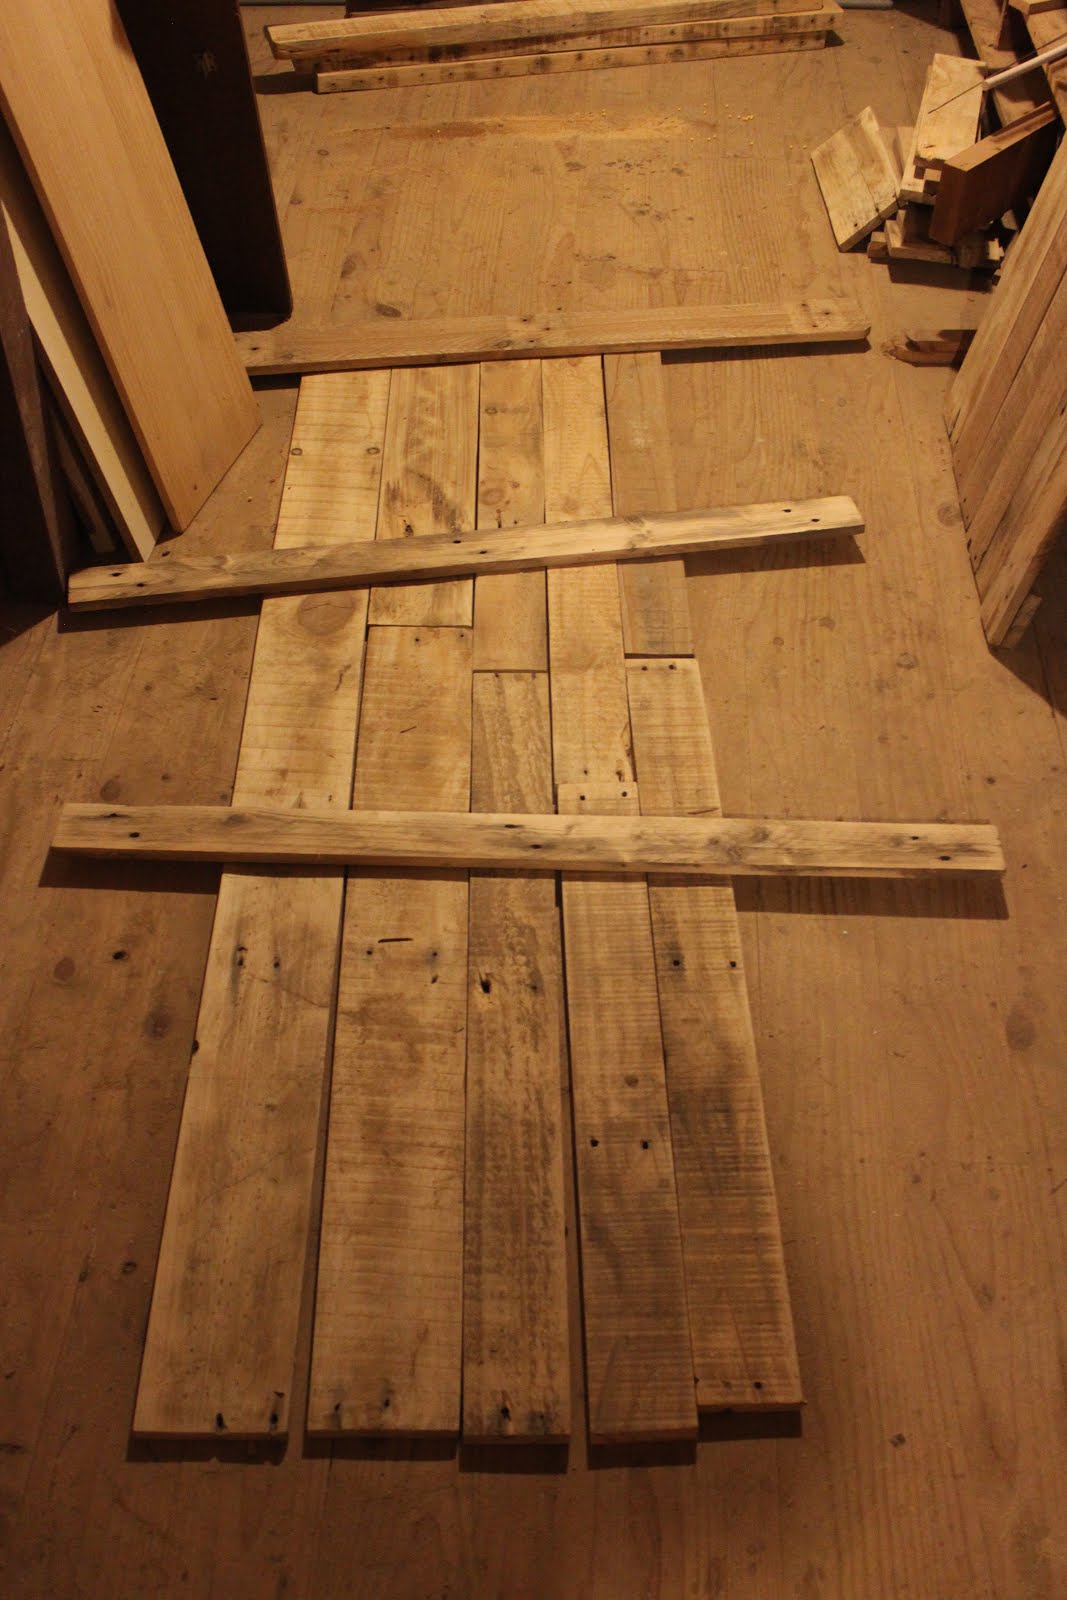
The work didn't start on Saturday; I had been hard at work, preparing various shapes for the sculpture any chance I had throughout the week. Using the silhouettes seen in last weeks post I was able to project onto MDF the image I wanted, draw it on, and then using my jigsaw, cut it out carefully. There were ten shapes of various sizes that I cut out with the jigsaw.
Prep for the first layer.
The organizers from the Hutt Valley Rotary club first put up the bottom section of the tower, the basis of the sculpture. This required digging post holes in the sand of more than a metre deep, and moving the base structure into place. We secured the structure to a bottom pellet, and filled the holes in with sand.

It was time for our construction to begin.
We required five round tiers with a 600mmX620mm square cut out of them so they could fit around the tower and onto a shelf we had made using decking timber.
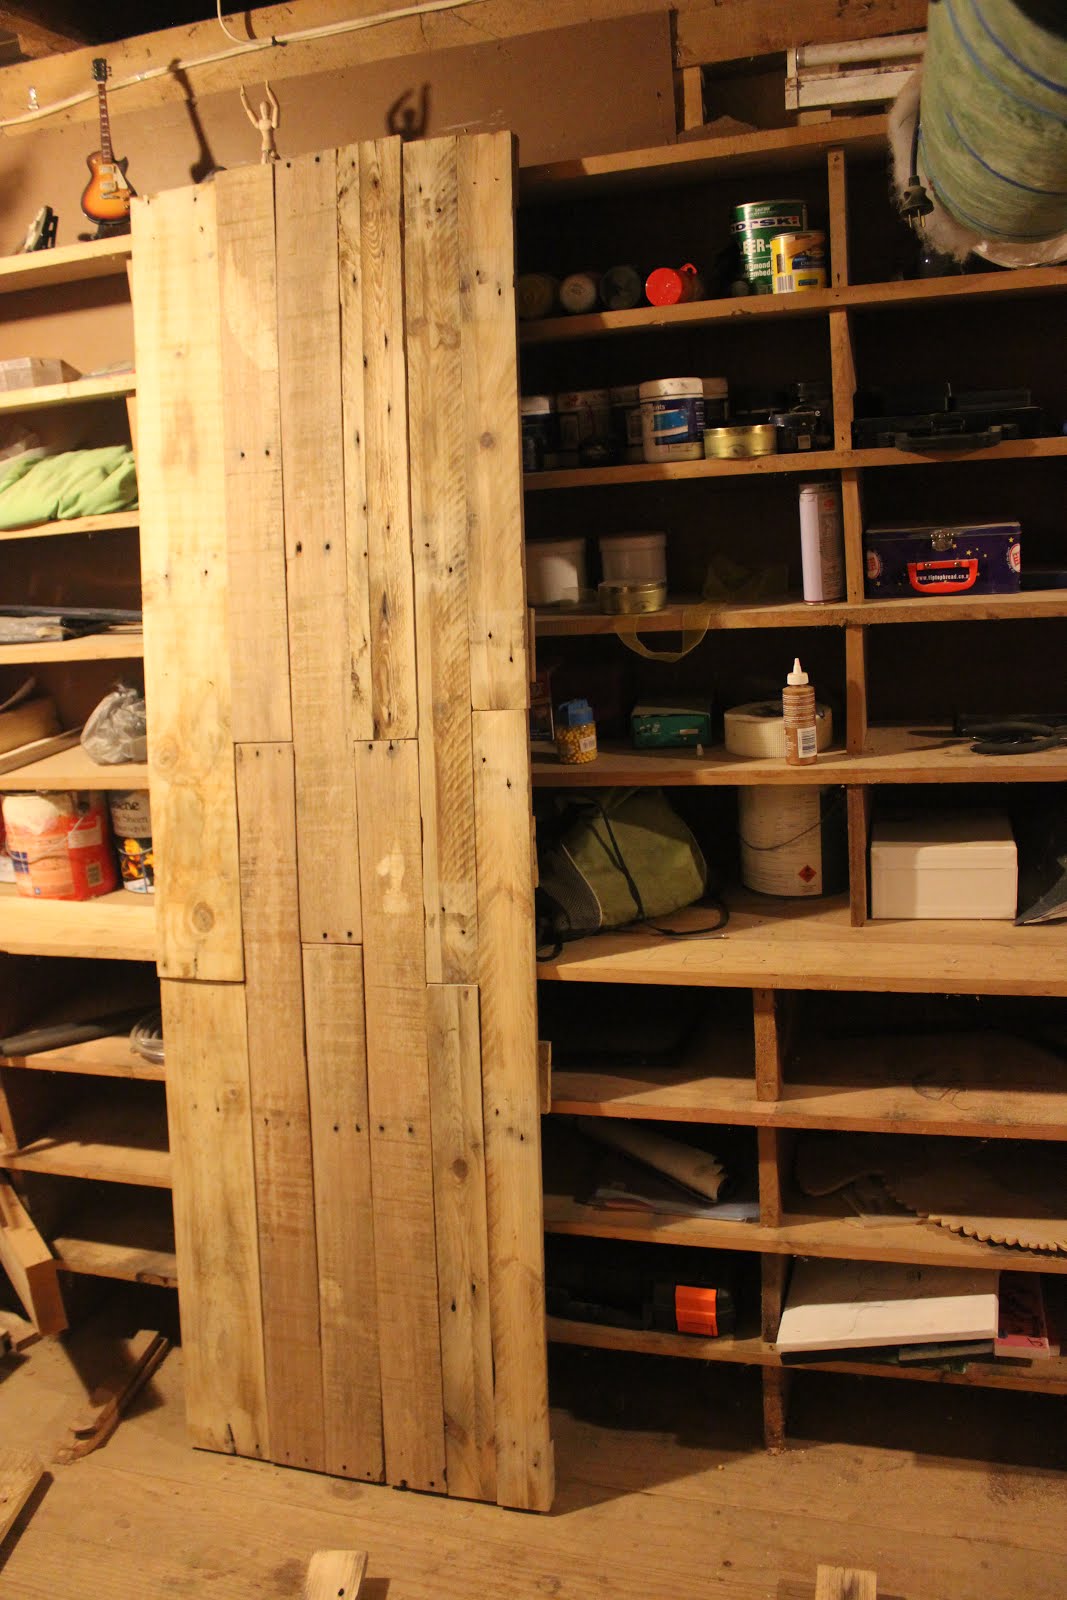
4 Metres tall
When the first two shelves were up we could erect the top part of the tower, and the scaffolding that would allow us to work on it.
We were told it would be four Metres high, It looked a lot higher when it was standing there waiting to be worked on.
Showing off a jigsaw cut shape: the fleur de lis painted in Scouting colours, as well as a sign with my name on it.
The rain came in and made the day a little miserable, however, work pressed on. We cut out, and set in place the last three round tiers.
We had a friend and scout Hannah helping us to paint the shapes before they were hung up.
Holes were drilled throughout the sculpture that would later be widened with the jigsaw for ventilation, more holes were drilled through each tier to allow the stringing of ropes and the suspension of animals and other shapes.
Setting the Stag in place.
While Chris, Shellie, and Peter strung up the suspended shapes I climbed atop the scaffolding and mounted the Stag, Alan, atop the tower in a position of supreme power over the rest of the Petone Carnival.
Inspecting the teams rope work.
The rain was still coming down and the tide had come in right up to the sculpture, We had finished construction, but we still had to pack up our wet gear, and tidy the site. After the tidy up we admired the sculpture a while before heading to the pub for a quick beer. The planned time of 6.30 was when the sculptures were to be lit.
The finished sculpture in the gloom of dusk as the tide comes in.
 
A much deserved drink  before the big light.

Upon returning to the beach we once more donned our fluorescent vests and walked the beach. Shellie took charge of coating the sculpture in diesel. An important job in the rain to ensure a quick ignition.
Diesel woman Shellie
 
The first sculpture is lit further down the beach.
When the first two sculptures were well underway with burning I was given control of the flame thrower and the task of igniting the sculpture was put in my hands.
I felt powerful with the flame gun, and within about a minute the sculpture was roaring to life, the flames battled their way through smoke and cardboard stuffing that filled the centre of the tower.
The animals were aglow with the light coming from the centre of the sculpture. The stag was shrouded in smoke, and as the fire burnt it fought its way up through the cardboard and engulfed the stag in flame, as it escaped the chimney.
Man with a flame thrower.
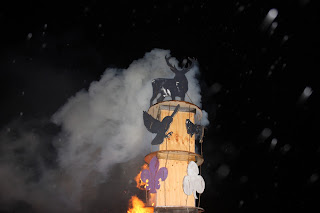
The smoking stag.

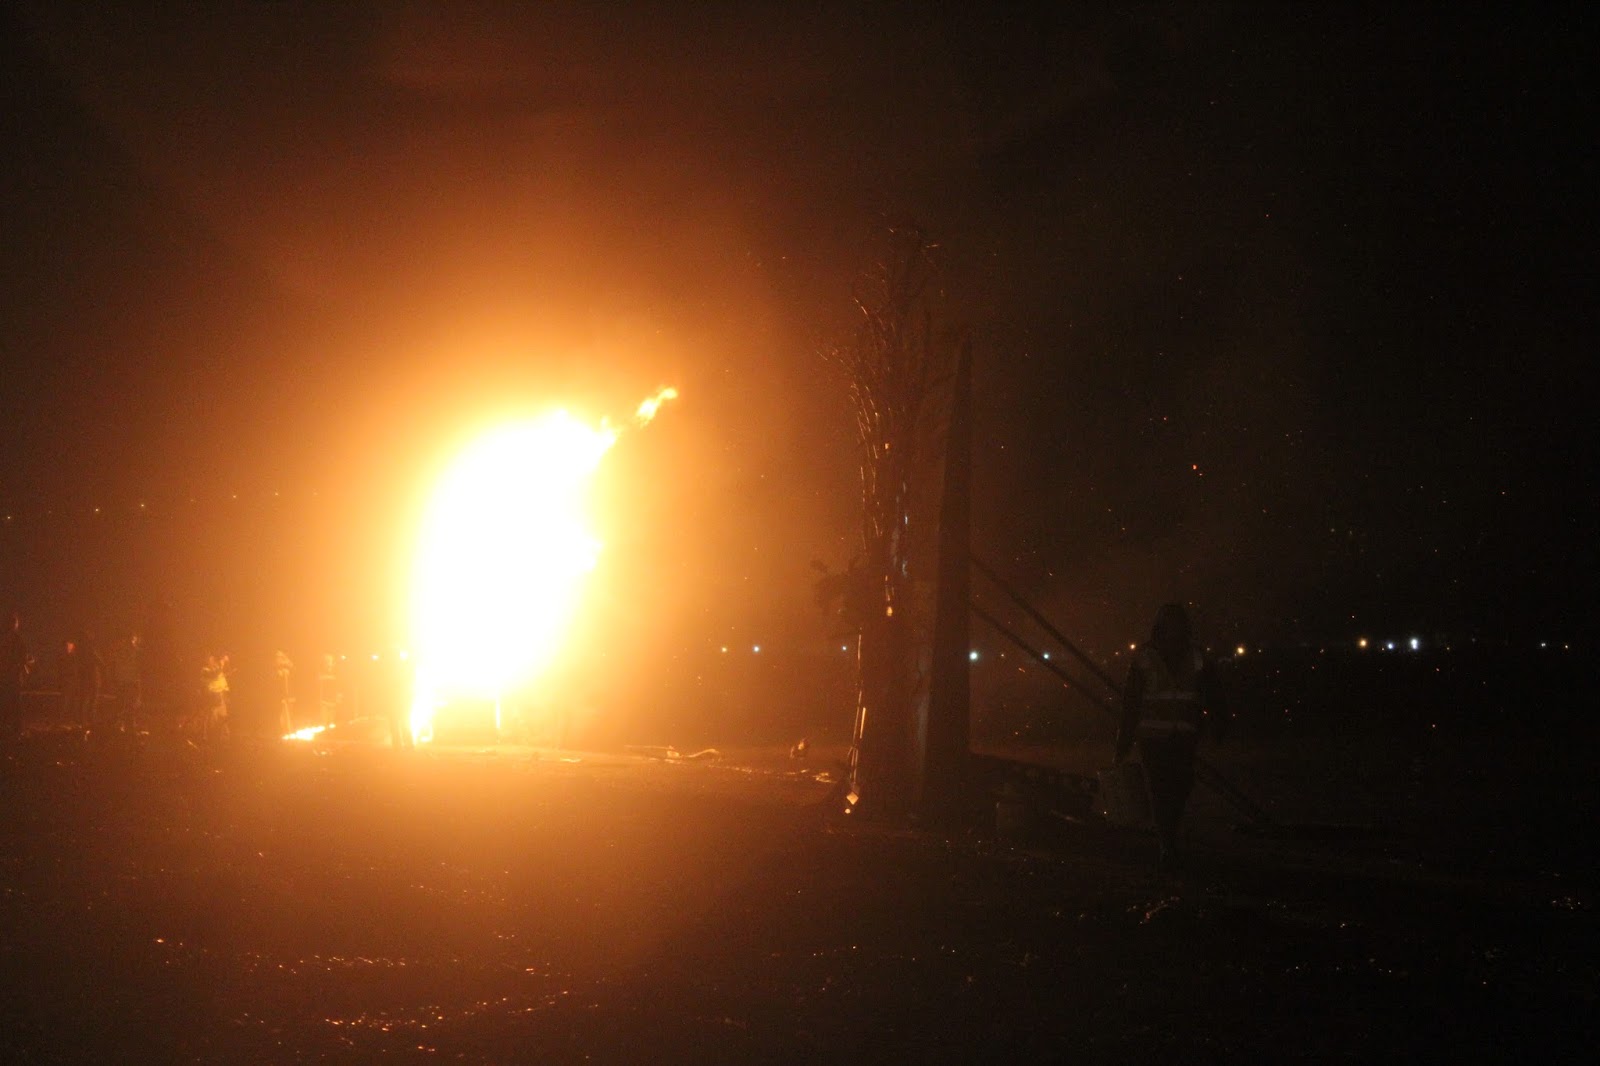
The whole sculpture on fire.

Originally the crowds were supposed to clear the beach and watch from afar, but within minutes of the first fire being lit the beach was full of eager bodies. When our sculpture went up the crowd surrounding it was huge, and it seemed to stay that way for the next half hour. Our hard work through the ick of rain and sand all day had paid off and people were basking in the heat of it, enjoying it.
The crowds observe the burning sculpture.
The flames went up and ate the sculpture from the inside out, we stood around guessing which animal shape would be the first to fall, snapping from its rope; surprisingly they all held very well. As it burnt on we watched in anticipation as the main supports burnt, eager to see the tower fall and crumple into a pile of flaming rubble. When it finally gave way the stag fell and crashed to the ground, on closer inspection he had smashed all of his legs and antlers off and was just a body. The fire crew scraped the large pieces into a large pile and we crowded together as it burnt on.
The flaming Stag.

The other animals warm up.

To me the whole day screamed success. I can't think of a better way to have spent my birthday, working hard on a project of passion, that the public admired, with my friends and family.
Me, the birthday boy.

Thursday, 30 July 2015

Designing a flaming piece of art.

The idea was brought up again months ago. We were at a Hutt Zone meeting for scouts and a suggestion was made to arrange an activity that would link Venturers (Youth aged 14-18) and Rovers (Youth aged 18-30). The idea that popped into my mind was the creation of a fire sculpture at the Petone Carnival 2015. 
Many local bands get a chance to perform on a range of entertainment
stages. Seen here is Man!/Woman! performing in 2012

The annual Polar Plunge happens
the morning of the carnival


I've been to several Petone Carnivals and they are a great day, the whole day is a brilliant chance to showcase the best things that the Hutt Valley has to offer; be it music, performances, crafts, metalwork, the annual polar plunge, and heaps more. One of my favourite parts of the day has always been admiring the fire sculptures. In previous years Shellie and I have taken a stroll down the beach to be away from the crowds lining the street, and whilst doing so, admired and contributed to the construction work taking place on the beach.
The first year Shellie and I contributed to a fire sculpture.
Two of the sculptures from previous years,
a drum kit and a phoenix like creature.


We have helped but never taken on the whole challenge on by ourselves. This year I thought, why not? and from then on my interest had been sparked, Through many an email to different organizers I was finally told that I needed to submit a design for a sculpture that met a bunch of specifications and had inspiration from the theme "A Midwinter's Night Dream".
http://www.coveralia.com/caratulas/Loreena-Mckennitt-A-Midwinter-Night-s-Dream-Frontal.php
At this point I switched into full on brainstorm mode, I needed help to come up with a sculpture design that would be sufficient enough to make the final cut, this year there would only be four sculptures created. A quick google search of a 'a mid-winters night dream' came back with this album cover, a similar concept to what I envisaged for my design. I thought of animals, trees, snow, and I also wanted to relate it back to scouting movement.


I made a lot of sketches, the ideas of my own and others onto paper, and figuring out the practicalities of building something that looked like the drawing.


The final concept was based on the circular appearance of a tree, with the presence of typical New Zealand winter woodland animals, as well as some symbolic relation to scouting. One thing we knew from the start was that it was going to feature a deer of sorts; representative of our Rover mascot 'Alan'.

The silhouettes that would inspire my sculpture design.
I needed to find a strong image of a deer to atop the sculpture. This image of a stag is clean and powerful.
https://www.flickr.com/photos/42293105@N05/4039153557
 I searched the internet for the best images of animal silhouettes I could find; using these as the basis of my Winter inspired sculpture I made a model of my intended sculpture.
This is the final Model I submitted to be considered.
The final model takes the cylindrical shape of the tree and the organic nature of hanging ropes whilst featuring the relevant silhouettes of animals and scouting symbols suspended by the ropes.
The centre piece is the stag symbolic of Alan atop the tower. Making the model was no easy task, I had to use my knowledge of craft, The process tested my skills.

After submission I had to wait while it was considered. A couple of days later I was told I had been chosen to lead the construction of one of four sculptures at the Petone Carnival for 2015. I was stoked. Now the real prep work begins.
http://www.eventfinda.co.nz/2014/petone-winter-carnival/lower-hutt
This Saturday Starting at 9.00AM a group of Rovers and Venturer scouts, led by myself, will be turning this design into a reality. The five and a half metre structure will be built, well braced, and shown off to the public, before being set alight in the darkness after 6.00PM. We will admire the temporal beauty of a structure made to burn and to look its best whilst on fire.

I welcome you all to attend, to come onto the beach and say hello, and offer some help. There will be fire, fireworks, and a whole carnival of sights and scenes to experience. See you there.

Wednesday, 1 July 2015

Recycle materials - DIY shelf.

When things are no longer needed it is easy to throw them away. Send them to someone else to deal with. Get them stuck in the ground where they will live for thousands of years. Out of sight out of mind.

What is harder to do is to put those things to a new use. Harder, but not too hard. Re-use of things is environmentally sustainable. Instead of sending things to the tip the minute they become unusable, you can either fix them or put them to a new use.

In my household there was no longer use for a large bathroom shelf, it was old, it had been painted a few times to give it a sense of new life, but after years of using it it was decided that it was taking up too much room.

I claimed it as my own before it was chopped up and used as firewood; and with it I reshaped the timber so it would fit into a new space; I measured the space and the lengths of wood and cut them appropriately. Next using a belt sander I stripped back some of the colour creating a marbled colour effect and discovering the shelf's previous colour history. Bare, Red, Blue, and now marbled. Next, using some leftover screws I screwed the timber back together, replacing the old rusted nails and staples that were previously holding the shelf together.


There, my finished shelf; smaller, more practical and it didn't cost me a cent.

D.I.Y. in this sense is useful in a number of ways, environmental sustainability is just one of the benefits. Obviously the price is attractive; paying nothing for a shelf is incredible value and definitely beneficial for your financial state of being.

Another benefit is upskilling. By following your nose (in a safe manner) you will discover a range of skills and techniques that you will use throughout your D.I.Y. work. These skills can range from the use of power tools, to the designing of furniture, to cleaning up after yourself. Skills that improve ones character, and also skills that can be applicable for employment.

Another important aspect of Reusing items and D.I.Y. is the physical doing. Actually using your own initiative to take on a project, physically do it, seeing it through to the end, and using the completed piece is incredibly rewarding. There is a sense of achievement that is earned in doing. A sense of pride in telling other people 'Yeah, I did that'. In addition, this sense of achievement can be increased when the project has been undertaken as a collaboration, with friends, family or colleagues. Doing D.I.Y. encourages cultures of making and in turn more D.I.Y projects.

Sometimes when items such as clothing are on their way out towards the scrapheap they can be reused in the most creative of ways. For a white trailer trash party I created a costume out of two pairs of old ripped jeans, I sewed them up crudely and reshaped them as hillbilly dungarees. They looked atrocious. Needless to say, I fit right in.
Reuse of old things in such occasions as dress up party's when needed is a cheap alternative to buying more stuff that of course will end up in the trash,

What a party! The dungarees were made to last the night and they barely did that. So where does a worn denim monstrosity go? Into the bin and to the tip? Of course not. I tied them to a pole and used them as a torch for a bon-fire. Giving the denim one last good use before never seeing it again.