Showing posts with label Product-Life. Show all posts

Thursday, 6 October 2016

Don't throw out! Use, Store, or Donate.

When it comes to spring cleaning and getting rid of all of the junk that you no longer use take a moment to consider where you might be able to send that stuff before concluding that it is rubbish doomed to a landfill. Also in your everyday dealings with waste consider these alternatives that are more environmentally friendly.
Getting started with the spring cleaning.
Appliances:
Old appliances when no longer useful or obsolete tend to take up space in a house. I still have an old Apple I-mac I am holding on to for no good reason. Some appliances still have value and it is easy to sell them on websites such as http://www.trademe.co.nz/ or in shops such as Cash Converters. If someone else can make use of it and you can profit from it then why not?

If that doesn't work you can try giving it away for free on websites such as https://nz.freecycle.org/. Here people give objects they don't want and take objects that other people no longer need. This website encourages re-purposing of everything from televisions and keyboards to glass jars and microphone stands.
Apple Imac. Taking up space and not being used.
Household items:
Anything intact and not electronic can generally be gifted to a second hand store, clothing, furniture, household goods, toys and books.

You can find your local Salvation Army Family Store here.
You can find your local SPCA Op Shop here.
You can find your local Wellington Vinnies Opshop here.
You can find your local Wellington Mary Potter Hospice Shop here
One of Wellington's many Op-shops.
http://www.vinnies-wellington.org.nz/wp-content/uploads/2015/01/Khandallah-Shop-Outside-2015-small.jpg
Clothing:
As well as the Op-shops listed above, there are some places that will take only clothing. Recycled clothing experts such as Rebound Clothing and SaveMart will take all clean clothing, even if it is ripped and useless.

Read here how SaveMart recycles through every step of their business:

Where does our stock come from?
It comes from various sources including:
1.Clothing Bin Contracts,
2.Recylcing Projects,
3.Woollen Mills,
4.Clothing Manufacturers,
5.Carpet Manufacturers,
6.Imports,
7.Surplus Stock,
8.Seconds and Opportunity Stores.

Hundreds of dedicated employees sort the incoming stock in to those items deemed suitable for sale in our stores, only the very best quality makes it onto the shop floor. It is value priced to sell in the same week. Unsold stock is removed after 4 weeks.

All wearable clothing etc that is unsuitable for sale in SaveMart stores is sent to Papua New Guinea where there is great need for clothing especially in the highland villages.

Inevitably there will be garments and material that are not able to be used again as originally intended, these can still be recycled as follows;

Cottons are made into Cleaning Rags, Knitted woollens and acrylic go to India to be made into blankets for relief organisations, Carpet yarn is used in the insulation industry.

Our aim is to recycle everything possible.
The inside of a SaveMart store, full of recycled clothing for sale.
http://savemart.co.nz/images/SaveMart_New_Brighton_065.jpg
Clothing Bins can be found in most suburbs throughout Wellington.
http://everydaysustainability.info/wp-content/uploads/2015/09/clothing-bin.jpg
As a person who always tries to make the most out of what I have got I tend to accumulate things, I'd like to differentiate between my thriftiness and being a hoarder because I try to use the things I accumulate. I have little containers filled with bits and bobs that I use from time to time. Here are a few examples of the stuff that I have that I hold onto for later use instead of throwing away.

Paper. Empty excercise books, blank paper, coloured paper, I have a pile of all sorts of paper that I can use whenever I need it. I use it to draw pictures, design my next project, scribble on, write lyrics or poems on, anything that I need blank paper for I have it sorted.
Shelf full of assorted leftover paper, to use when I have need. 
Scraps of paper. I tend to accumulate scraps of life in the form of paper, whether this be ticket stubs, pictures, words, cards, post cards, photographs, or any number of other beautiful things; I tend to keep them. I have previously organized these onto cork boards, but more recently I have compiled them into a scrapbook. My scrapbook is a way for me to remember many scraps of time in a creative way, I glue all of the different pieces into the book, and then draw and write words around it; I empty my brain of all of the memories associated with that physical piece of my history.
A few open pages of my scrapbook.
Some of the images and physical memories within my scrapbook.


I have old notebooks intended for drawing in. I challenge myself to fill them up, here I get the most crazy images that come from my mind, they are for my eyes only unless I choose to share them, and I get to use the pen and paper in a way that nobody judges. I challenge you to find an old notebook around and to fill it up with ink in anyway that you can.

A Sneak peek from my weird doodling book.
Other Junk: I keep a lot of other junk hidden away for when I need it. I use old containers to store things in. Have a look at this older blog post about storage conatiners for some examples.

As you can tell I try hard to reuse as much stuff as I can, however I am realistic and know when something is at the end of its life and should be recycled or thrown away. The key part is really trying to make things last.

When something reaches the end of its life be sure to recycle it if possible, some plastics can be added to your weekly recycling collection, as can some metals; other metals will need to be recycled by taking them to a scrap dealer, if the metal is worth anything you will also receive payment for it.

As the sun begins to stay around a bit longer and you approach spring cleaning, be sure to minimize waste, re-use and recycle.

Monday, 20 June 2016

Building a Wardrobe.

When we moved into our flat in Wadestown, Shellie and I claimed a large bedroom, the only problem was it didn't have any storage space. For the first while it was quite a mess. We moved a couple of shelving units into a spare bedroom down the hall and hung all of our clothing in a wardrobe down the hall that wasn't being used, this was less than ideal but worked nonetheless.

In the months following I came up with ideas on how to optimize the space in our bedroom and to contain our stuff. One of these ideas was to build a wardrobe that would live in our room and not down the hall.

Over the next few weeks I constructed a wardrobe that would fit our needs. It would be over 1 meter wide and tall enough to house two bars full of clothes.

I had the help of my friend Adam, and Shellie also helped out.
1900mm X 600mm.
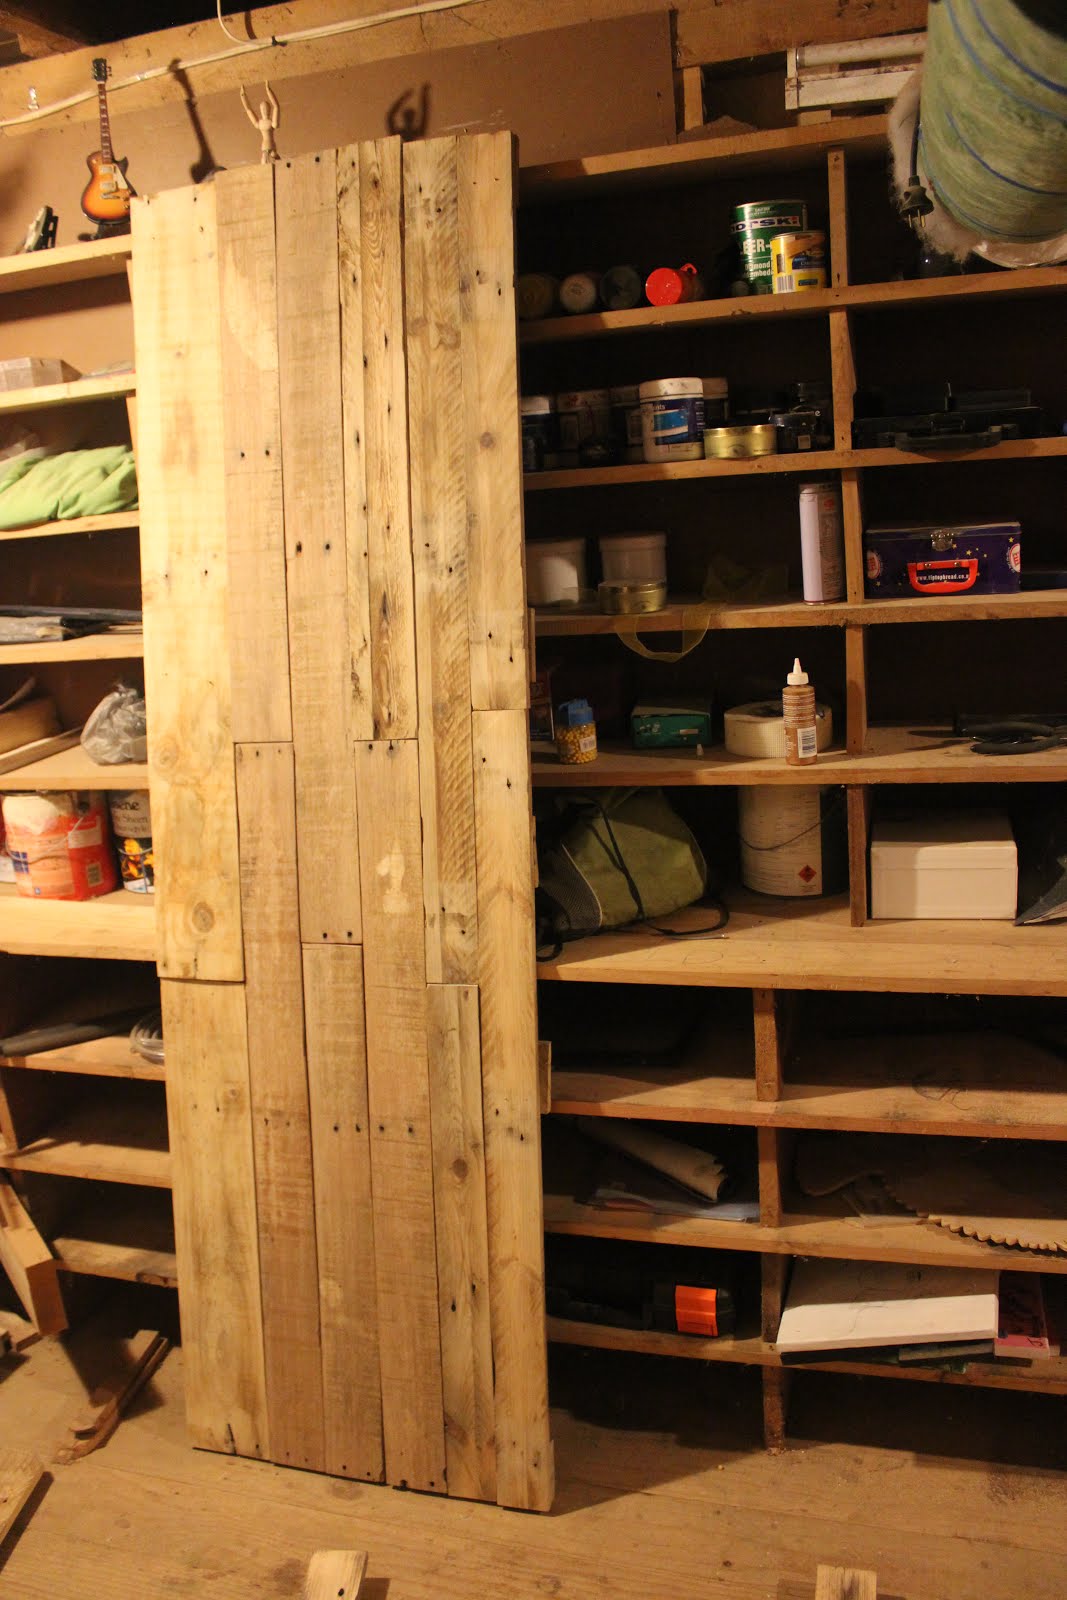
One solid wall piece.


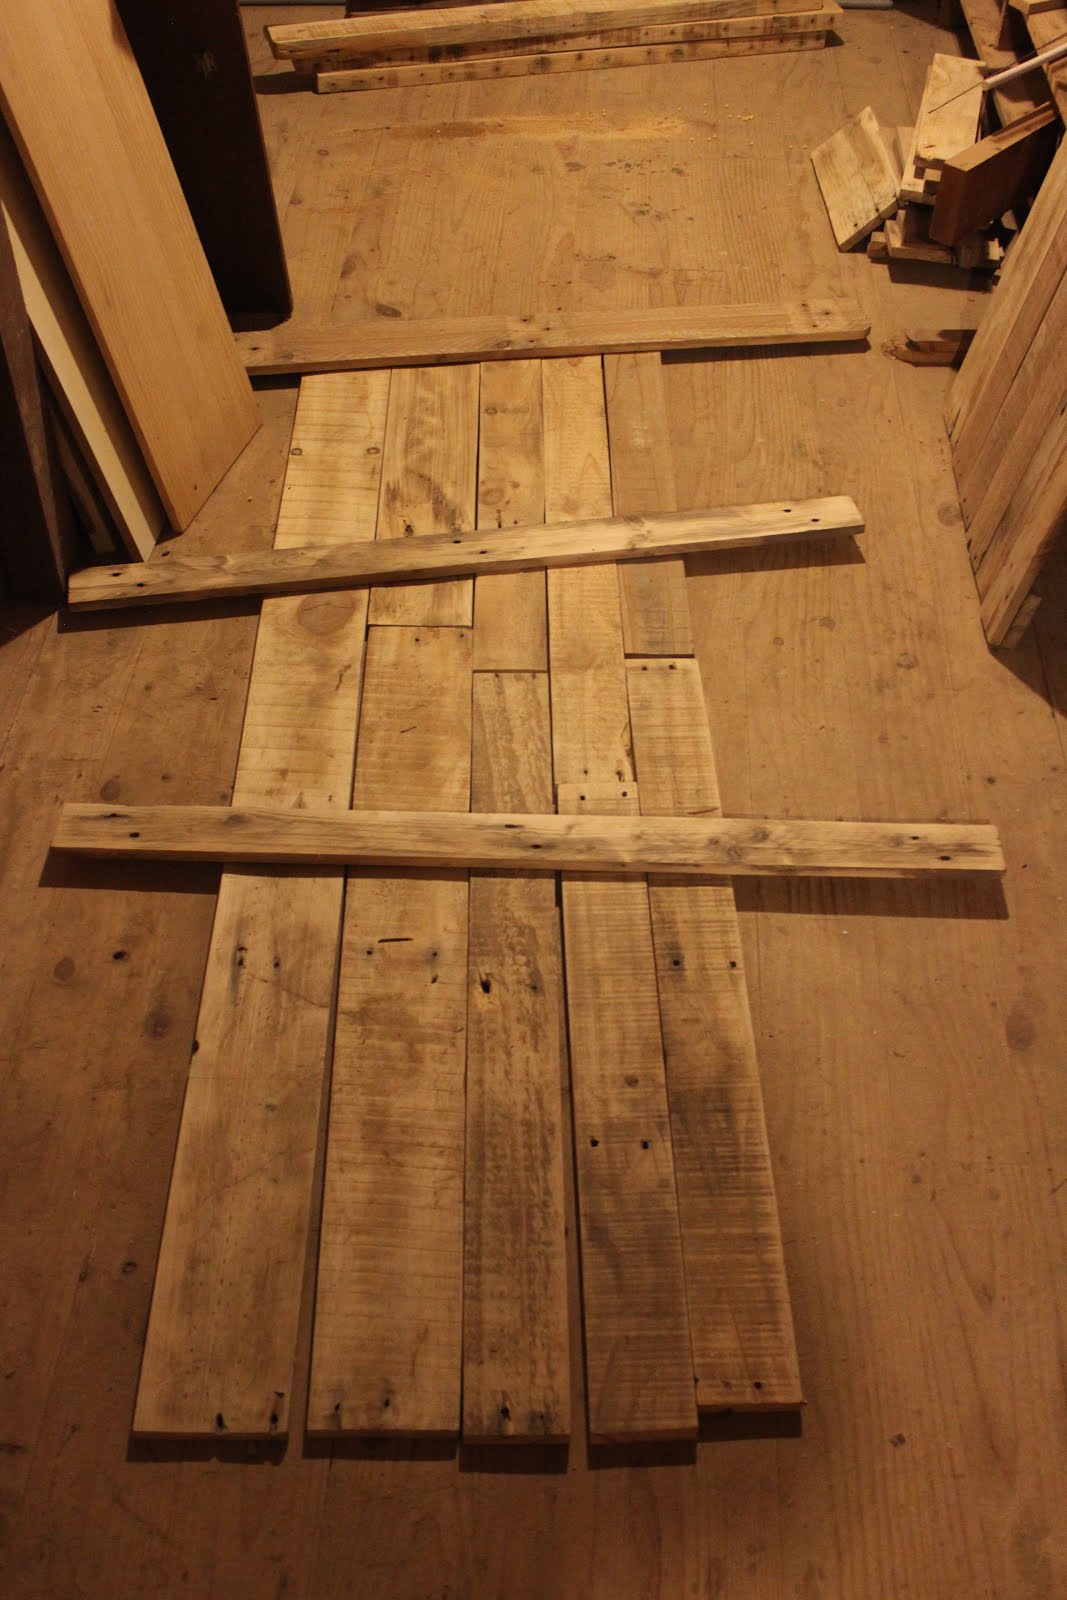
After completing construction of the guitar stand Adam and I set to work on creating the wardrobe walls. Using sanded down pallet wood we measured and cut the timber, laying it out so it was 1900mm tall and 600mm wide. We used five other pieces of timber to screw to the laid out pieces, thus forming one solid wall piece. This was harder than we initially assumed it would be as our pallet timber was imperfect, bowed slightly in places, and not all the same thickness, this meant an inventive and rough technique was needed to force the timber together in places before screwing it all together so that it aligned neatly.

Over the next few weeks I finished off the second wall; I cut in half a steel beam to create two smaller beams of even length; and I made both a top and bottom base which the two walls would sit in and be attached, this I achieved by nailing four 4X2 pieces together much the same way as I had for the guitar stand.
Before lining it all up I used my jigsaw to cut out gaps where the two beams could slot in; this was an error of judgement as I hadn't made an allowance for the top base which had an overhang that covered the gap. This cost me time in cutting a new piece of timber and a new gap.

Lining it all up


Top base overhanging the gap for the beam.
Before nailing the walls to the bases and constructing the wardrobe as a complete piece of furniture I needed to make it pretty and safe. A lot of the screws I had used were longer than the wood was thick so they stuck out dangerously. Being the safety buff as I am I needed to find a way to remove them. I called Adam over and he provided me with an angle grinder which he taught me how to use. The two of us took turns removing any sharps from the two walls, using the correct protective gear. Safety glasses for our eyes and earmuffs for our ears. The grinder is a dangerous tool and we had to clear the area from anything that could catch on fire from the sparks, a perk of having a friend who is a volunteer fire fighter in has spare time.
Adam taught me how to use the Angle Grinder


We removed sharps from the two walls.


We cleared the works bench of things that could catch on fire.
That evening I brought the pieces of wardrobe into the bedroom, I couldn't construct it elsewhere in the house as it wouldn't fit through the hallways very easily. Shellie helped to hold the walls steady while I nailed the pieces together. when the box was completed with the two bars inserted into their gaps I assessed the wardrobe, it had quite a bit of movement, so I cut and sanded down two braces to cross the back of the wardrobe, these stabilize the whole wardrobe, stopping excessive movement.

Shellie helped me by holding the walls still.
The two back braces stabilized the wardrobe.


The finished wardrobe fit the corner of our room snugly. The next night I took delight in filling it with our clothes. Now we no longer have to walk the length of the house to pick out the next days clothes. 
Our new wardrobe filled with clothes.
Creating a wardrobe from nothing but pallets was an exciting opportunity to learn some new D.I.Y. techniques, to learn how to use tools I haven't explored before, and to add another piece how furniture to our room that tells a meaningful story that purchasing an ugly plastic rack never could. By reworking old materials into something new I am adding my work and my daily life to the wardrobe. I am creating a new history for materials that already have a prior history, to me that is fascinating.

I don't know exactly where this timber came from originally but I can decide where it will end up after I am finished using it during my time flatting. Likely it will be used again as a wardrobe by someone else, taking with it the history of its creation and my use of it.

Wednesday, 27 April 2016

De-Construction of Pellets

With Valley Rovers as a fundraiser we decided to split wood and sell it on. While the wood dried it sat on a bunch of pellets which I got for free by asking nicely at the Dominion Post. As we have started to sell our wood and the pellets have freed up I have been able to take the pellets and make use of them.

I brought them back to our flat and tried a bunch of ways to deconstruct them. The videos below showed a couple of ingenious ways to take pellets apart without destroying the timber. I tried a couple of these methods but they were a bit  hit and miss.
I eventually told a mate of mine who in turn lent me his Stanley Wonder Bar Crowbar. This paired with a hammer did the trick. (Ear muffs were a must for deconstruction).

Stanley Wonderbar - as seen on Amazon.
I deconstructed pellets so as to make new stuff. I have a variety of projects in the line that require a large amount cheap timber, pellets are ideal for this, in my case they are free (apart from transport costs) it just require some time to deconstruct them and make them pretty.

Heres some videos I watched.

This video is a striaght up deconstruction video done with a hammer.
https://www.youtube.com/watch?v=ZtPmUZ-k3aI

This video shows an inventive method using the weight of bricks to seperate the timber.
https://www.youtube.com/watch?v=O7oWaRPpdKU

This video offers a range of methods that didn't apply to me, and is very safety conscious. But still a good watch.
https://www.youtube.com/watch?v=thAsa9jE2QQ

Heres the tools I used.
Hammer - any old hammer will do
Stanley Wonder Bar Crowbar - as seen above
Brush - mine is a wooden handled brush that came paired with a steel shovel, perfect for cleaning the dust and wood shavings off the timber and the floor.

A pile old pellets - yet to be turned into beautiful fresh timber.
Once the timber was separated out I used my claw hammer to remove any nails left in the timber. Sometimes the old rusty nails would snap off in the timber so for safety and the integrity of the timber I had to punch them deeper into the timber using another nail as a nail punch.

http://www.justagirlblog.com/how-to-install-a-pallet-wall-part-1/
The timber needs to have nails removed carefully to ensure its integrity.
The next step is to sand the timber. This strips the surface layer from the wood, revitalizing it and making it seem new again. I borrowed two electric sanders for this job. The first is the belt sander that rips off the old and used top layer of timber. I try not to rip too much off so the timber to give the timber the desired rustic look so people can see that the wood has already lived and served a purpose.

The timber is clamped down while I strip it using the belt sander.
http://www.skibuilders.com/phpBB2/viewtopic.php?t=810
Some timber given a rough sand.

Now that the timber is fresh, revitalized, ready to use I have to come up with a few projects with which I can use the timber. The first thing I wish to make is a wardrobe, as our current room in the flat doesn't have one. Other projects I wish to do with recycled timber include a guitar rack, and a book shelf.

4X2 planks salvaged from pallets and sanded down
A plank salvaged from a pallet. Nails removed and sanded down.
Now to make something, check out next weeks upcoming post to see what project I do first.

Wednesday, 13 January 2016

Fixing a bag into my sewing kit.

This was a cool little project, not a difficult one but one that took some time to do.

It started at a party that was held at our place around four years ago; an unknown girl came along and dropped her bag in the bathroom, leaving it there without any indication of who she was we decided to hold onto it just in case she came back for it.

Inside the bag was a couple of coins and a key. Not much to go on, We never heard from this mysterious person again.

On occasion I have taken the bag out and  thought about how it could be of use. My girlfriend tried to use it as a going out bag once or twice, but we realized that the stitching that held it together was breaking.


Recently I've looked a the bag again and seen that it is actually a fairly old leather bag. the stitching looks like the original stitching and is only just getting old enough to break with the pressure of holding it together.


On the inside is a pocket made not of the original leather, and not sewn on, rather, just super glued on.

Upon looking exploring the properties of the bag I came up with a use; I would turn it into my sewing bag. Starting by removing the strap, I will be sewing this to my camp blanket when I get the chance.

For those of you who do not know I have a camp blanket  that I love dearly. I have hand sewn everything on there including all of the scarves. Some of the badges I share with my partner in crime Shellie, but a lot of them tell of my scouting journey.

For the bag itself I needed to replace the stitching and that's it. Not a hard task, but a task that needed to be done correctly. I took a trip down to spotlight and bought some brown waxed thread, the last of the roll. I hoped it was enough.


I cut out the old thread with some small scissors and a quick unpick, and explored the three leather pieces that I was left with, very simple shapes, a very simple way to make a bag. Next I sewed them back together with the new waxed thread. Not difficult, but it took a good half hour to do.


There it is.

I sorted all of my sewing supplies out, cotton, needles, badges. And fit them all into my new sewing bag.

I think the difference between myself as a sustainability conscious designer and other people as hoarders, is that I intend to use the things that I collect.

A bag that has sat around for years now being used in a way that is beneficial to me. This has many more years of use left in it.

Wednesday, 6 January 2016

Darning my Clothes

I wanted to know could I salvage my jersey?


The deteriorated arm cuff.
I'd always wanted to learn how to darn so having clothing that was falling apart on me was the perfect excuse to.

Like a lot of fabric crafts I have had this preconceived notion that darning was a female craft. Perhaps once upon a time the ladies would jump at the chance to sew, knit, or darn the clothing of men all around to show off their mad skills; maybe not, it is more likely this was a result of a tradition where men were bread winners and women stayed home and didn't spend money; how the times have changed! Nowadays the suggestion that the ladies should do it for you would likely earn you a slap.

In the process of darning.
As more rows are thread the jersey pulls together more easily.


One of my favourite woolen jerseys, a re-purposed school jersey had been looking a bit worse for wear. The sleeves had laddered considerably, and one of the cuffs was hanging by a couple of threads. The idea was to darn these parts of the sleeve to make the jersey look less scruffy, to save it from deteriorating further, and to keep my arms warm as intended.


To darn you need a length of wool, in this case mine is black to match the black wool of the jersey.
A large darning needle, big enough to thread the wool through, a big needle of around 100mm is a good length to use.
A lot of holes are made over joints such as elbows and ankles. For holes like this it is useful to use a cup or egg shape to shape the hole naturally.
The upside down cup is used to stretch the hole out into a natural position for darning.

Through the magic of the internet you can find many images and tutorials to darning, they can explain the process much better than me. These images influenced how I went about my darning.

https://en.wiktionary.org/wiki/darn

http://www.ecouterre.com/mend-and-darn-clothing-world-war-ii-style/patch-darn-shirt-mrs-sew-and-sew-4/

https://blog.colettehq.com/tutorials/make-do-and-mend-darning


The link above was for me the most comprehensive and easy to understand guide to darning.
My jersey partially darned.

Darning is like many other crafts in that by practicing doing it will prove better results. My first attempts were acceptable but not amazing.

A darned object has been altered in a way that does not hide the fact too well; darning as well as a number of different design techniques such as the Japanese pottery technique kintsugi can be used to highlight the part that has been repaired. The owner of the item recognizes that the item is more beautiful for having been broken. In the case of my jersey I can recognize that it ripped in several places and reflect upon the memories of adventurous activities I have had whilst wearing the jersey.
In the process of darning along a large tear.
The nicely finished tear darn. It has been turned inside the right way.
I currently have a few other items that need mending, I believe that the more I practice the neater my darning will become. I definitely believe that darned clothing is a fashion statement of sorts; it tells the world that the person wearing the clothes is happy to reuse and fix clothing to give it a longer life. I do not need to throw this  jersey out and buy a new one.
The darned jersey arm. Not perfect, but practical.
Me looking pretty stoked with my fixed jersey.

Wednesday, 24 June 2015

Buy good things - Clothing, Technology, Everything

Through life as we grow we are ever changing. Our needs change in the smallest ways that effect what we do, what we use, and therefore what we buy. 

Since I was about 13 denim jeans have been my choice of trouser, warm, comfortable, and fairly sturdy. In the last few years however my lifestyle has become more active, especially as a scout and a scout leader. One of the unfortunate results of this is that being active tends to result in holes in my jeans, in particular right in the middle of the crotch. 
This has led me to reconsider the suitability of denim jeans for my lifestyle, although I have tried to mend my ripped pants, many pairs have already been thrown out. I have been led to believe that there is nothing like a new pair that won't rip in the first place.

Holes around the crotch

I was gifted a $100 voucher for my birthday redeemable at Kathmandu, an outdoors retail store. I'd browsed the store previously and noticed they had a range of trousers for men and women ideal for tramping and other outdoors activities. I went in one day and grabbed a few pairs that looked like my size. I tried a few of them on and went back to ensure that I had the best fit for me; only for the store worker to tell me that they were women's pants. I thought this can't be right, they were regular black pants with no sign of being catered to women, but I checked and surely enough they were measured in size numbers 14, 16, 18... instead of the blokes sizes of S, M, L, XL ... I went back to the shelf and realized there were no remaining men's trousers.

This conflicted me a little bit. I knew that they fit me quite nicely, and I knew that if I couldn't tell the difference between men's and women's trousers no one else would. But I still knew that I was wearing women's pants, would this knowledge leave me feeling emasculated? I decided to buy them anyway. 3 pairs of pants for $90 was an absolute steal.

At the counter the worker told me I can always come back to change them if I feel uncomfortable wearing them. Even in that moment I had made up my mind and I knew I wouldn't return them; even now as I type this I am wearing them and they are as snug as ever without the slightest tear in them. My testicles are in tact too.
Kathmandu Womans Size 14.

I have learnt to purchase good items that are suitable for my lifestyle that are going to last. These may cost a bit more than the cheaper alternative (I still keep an eye out for a sale though).

I still have old clothes, these are used when I do physical labouring work, gardening, painting, or exercise. Nobody cares how I present myself in any of these situations; and I don't care if my old clothes get ripped, dirty, or painted on.
Paint splattered clothing for my eyes only

In my first year of university study my first big purchase was a decent DSLR camera (Cannon 550D), saving up a wee bit more money for a decent model of camera that would be sufficient throughout my studies and beyond. I'm still using it and it has no sign of giving up just yet.

Buying one expensive thing that will last a long time is far better than buying hundreds of cheap things that will break. In the long run it is more economical, and it is much more environmentally friendly.
Cheesy reflection shot

I have always wanted to own a pair of doc martins boots, among my hip friends many have their own pair of docs which they purchased brand new; apparently the best way to buy something so valuable and personal. For me the opportunity came when a friend was selling his boots I seized the chance. $50 I had my own pair of docs, I had to grind down my own gradient to the shoes and find some new laces but now I own them and they fit me as any new pair would; with a bit of shoe polish they look brand new as well and none of my doc wearing friends know any different.
With a bit of Shoe polish they look brand new again.

The list goes on and I can give you innumerable examples of when spending more is better than buying the cheap alternative. But each situation requires its own thought from you, the consumer.

I am a practical person. Spending more should result in a better product. I don't believe in spending more just for the status of investing in a brand, but I don't want to waste my pennies purchasing rubbish that is inevitably going to end up in landfill. I search for the reasonable middle ground. Practical lasting quality from a good product is what my money is worth.