Labour day brings us a Monday of work off and an excuse to either blob and do nothing for an extra day or to jam pack our weekend full of all of the things that we wish we had time to do but generally don't.
My fiancee Shellie and I chose the latter.
We like being busy creating things or going on adventures throughout our city and country. We decided Saturday we would wake up early and get straight to work in making a vegetable garden.
The basis of the garden; old pallet timber
We salvaged the old pieces of pallet timber from around the property to construct a box that would provide the basis of our garden.
Take note ladies, you too can get stuck in.
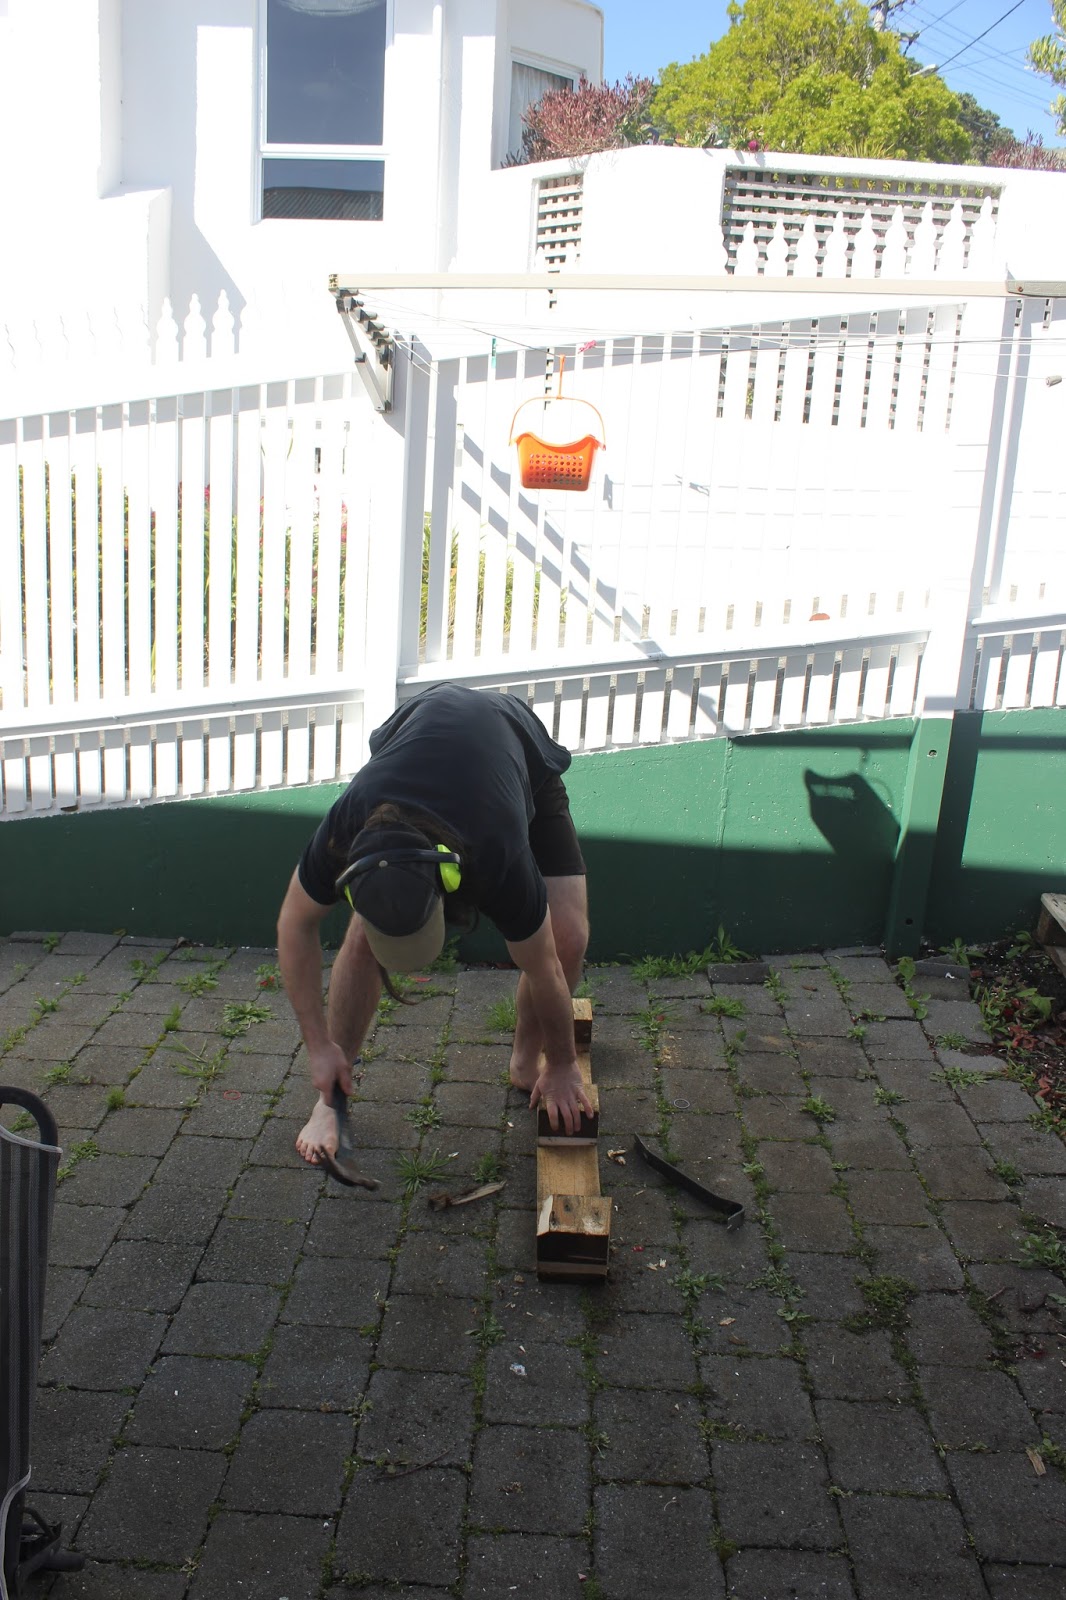
I had a simple design for a box in my mind and between us we brought it to life, we each wielded a hammer and got to work creating the box.
Wood slats on the bottom
Seeing as we were to put our new garden straight onto the lawn I decided that putting a bottom on it would contain the soil and plants in the box and also keep weeds from outside of the box from getting in.
Salvaging wood from old pallet scraps.
We didn't have quite enough pieces of timber the right length to cover the entire bottom so I had to deconstruct some other pieces of pallets I had around to get all of the pieces needed.
The bottom covered
Giving the box the bottom not only acts as a container for the soil and plants, but also gives the rest of the box strength, by pulling it all together.
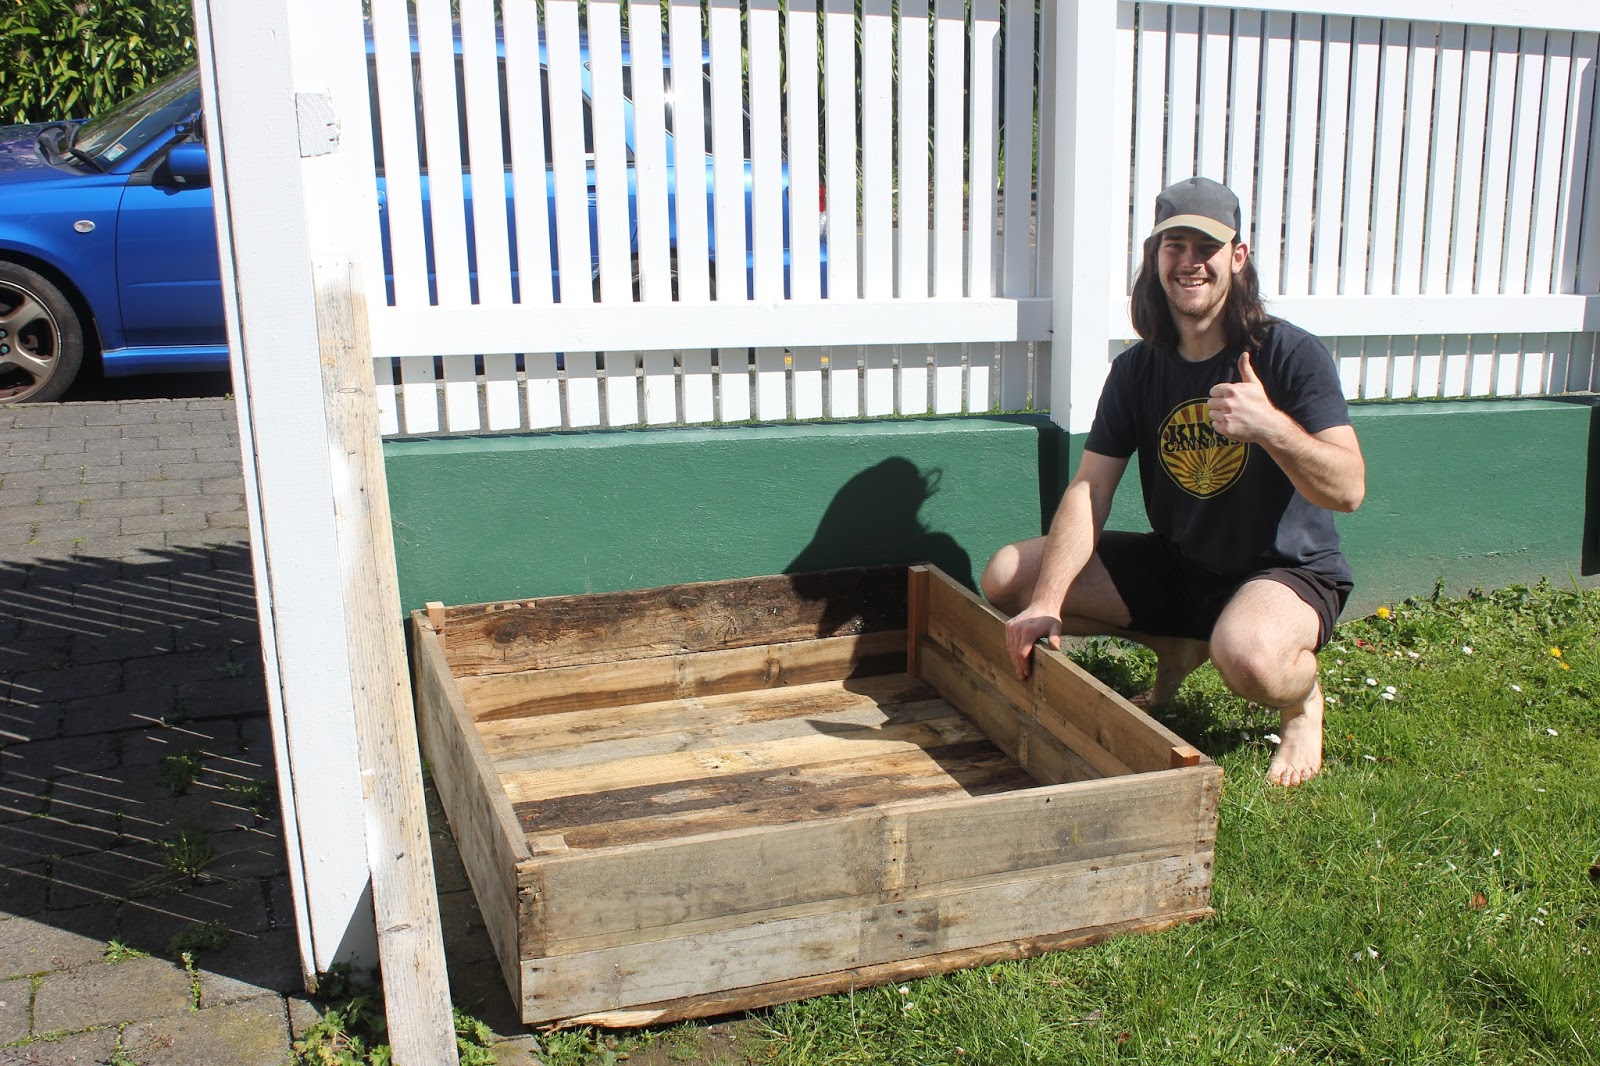
Our finished box
The morning's job was over, we had completed the box construction, after lunch we would get to planting some veggies.
The garden box in its final resting position, unobtrusive and situated for morning sunshine.
We have been flatting in Wadestown at the forge, for the better part of this year, and have consistently been adding to a compost bin that was here on the property when we moved in. Over the course of six months we have been adding our food scraps and grass clippings to the compost bin and given a mix every now and then. The result of six months of being fed and breaking down, is beautiful soft soil that can now be used for our garden, hopefully to yield a good bunch of vegetables (at least enough for a salad).
The black compost bin stays out of the way
Inside is a mix of soft soil and the plant matter that will break down into it.
It took a few trips of carting buckets back and forth from the compost bin to our garden in order to fill it up. It also became hard to dig the soil out from the bin, fortunately these compost bins do not have a bottom so they can be pulled up and over from around the soil, this made things a lot easier.
The box filled with soil and divided into 9 equal sections.
By dividing the garden into sections we made it easier to keep track of the plants we will plant, one square for each species.
Constructing a frame for bean vines to climb
We had purchased some bean plants which grow in the form of a vine, in order for these to grow properly we had to construct a frame which could then have string hanging from it.
Stringing the frame so the plants can climb up
We planted a bunch of different plants including beans, tomatoes, carrots, capsicum, cucumber, lettuce, and also marigolds. The marigolds are said to repel moths and other insects; hopefully this means that when our vegetables grow they will not be eaten by bugs but be in tact for when we want to eat them.
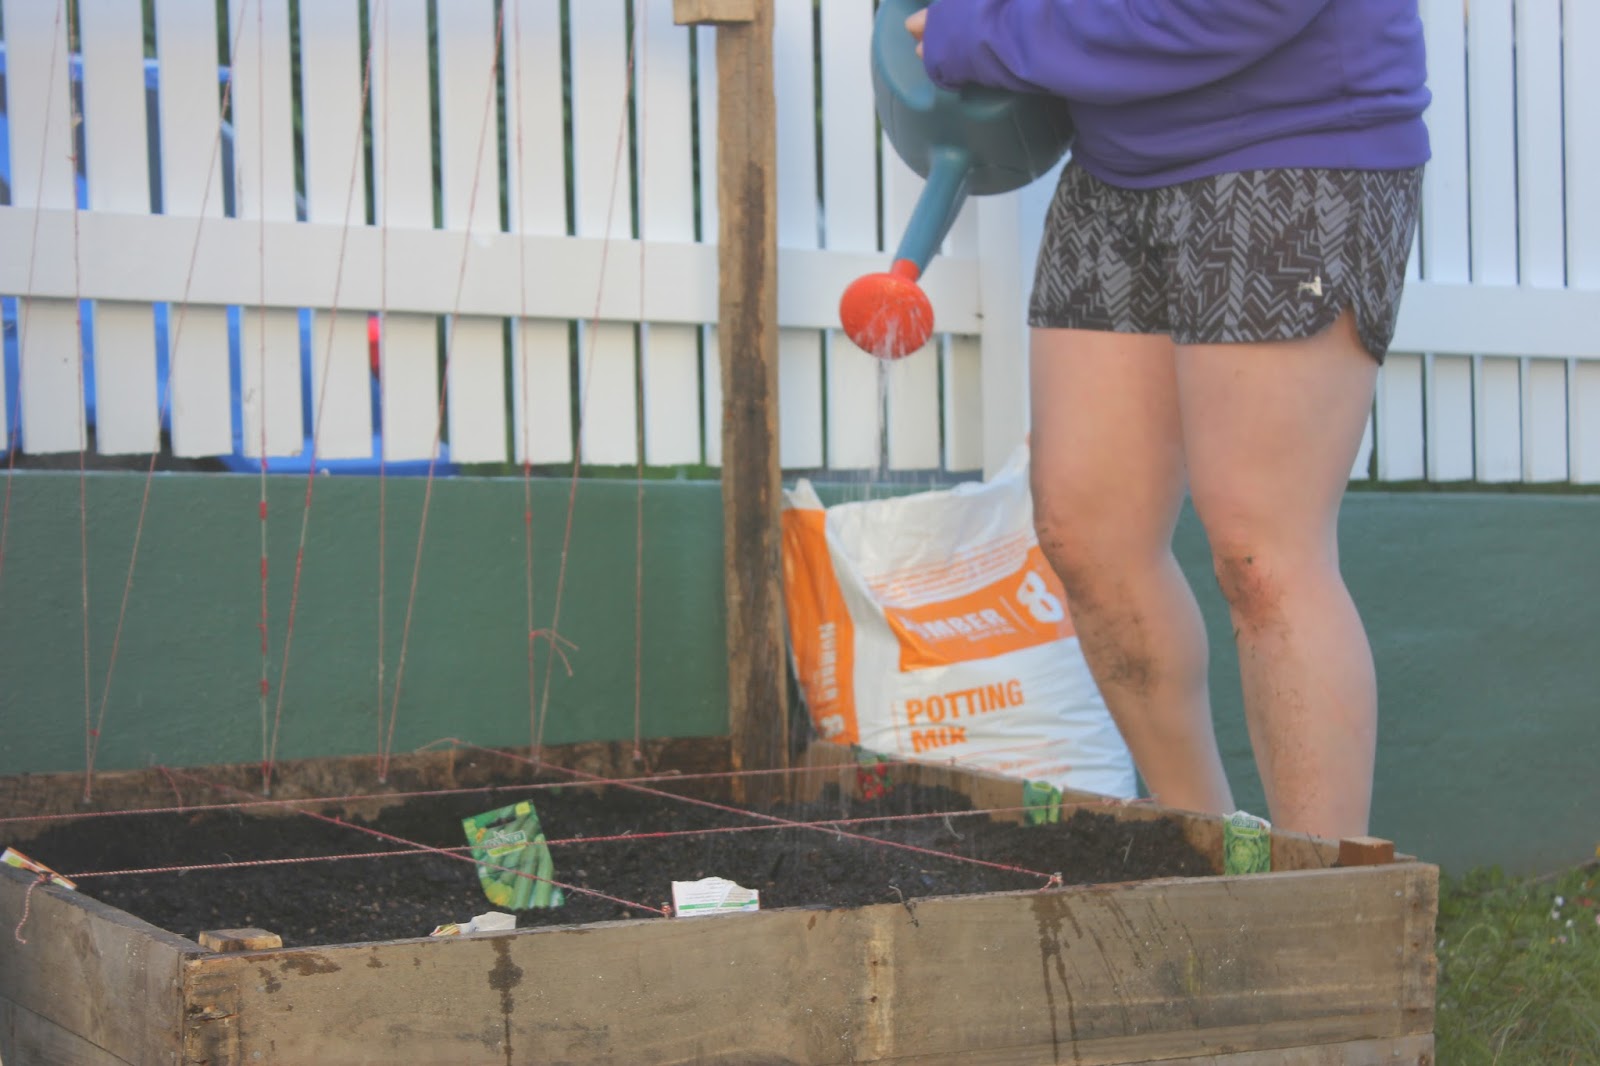
Watering our plants for the first time.
We watered all of our plants for the first time, something we will continue to do, especially on hot summer days. Watering is best done at dawn and dusk, when it is the right temperature to allow the plants to absorb the water without the sun evaporating it.
Gardener Jayden: American Gothic impression
And of course, the best way to celebrate a job well done is by posing in a few silly photos. Behind these two silly poses I was sincerely stoked with what we had accomplished in a day. It is about time I starting taking part in gardening, something I think is so central to sustainable living.
Gardener Jayden: Rocking out with a rake.
Gardening is a fantastic hobby to have. It requires hard work, care, and patience. Just like hunting and farming it allows people to appreciate where their food comes from. Through consistent care of your garden you will reap the benefits of nutritious food to sustain your own body; you will also know exactly what has gone into the soil to create your food, it is your decision whether or not you use pesticides or fertilizers to enhance your plants growth (ideally not), I believe a garden needs good soil, plenty of sunlight and a little bit of water to encourage the best growth.
That's it.
Put simple things in to get the best things out. I hope. I'll tell you how it works out at the end of summer.
When it comes to spring cleaning and getting rid of all of the junk that you no longer use take a moment to consider where you might be able to send that stuff before concluding that it is rubbish doomed to a landfill. Also in your everyday dealings with waste consider these alternatives that are more environmentally friendly.
Getting started with the spring cleaning.
Appliances:
Old appliances when no longer useful or obsolete tend to take up space in a house. I still have an old Apple I-mac I am holding on to for no good reason. Some appliances still have value and it is easy to sell them on websites such as http://www.trademe.co.nz/ or in shops such as Cash Converters. If someone else can make use of it and you can profit from it then why not?
If that doesn't work you can try giving it away for free on websites such as https://nz.freecycle.org/. Here people give objects they don't want and take objects that other people no longer need. This website encourages re-purposing of everything from televisions and keyboards to glass jars and microphone stands.
Apple Imac. Taking up space and not being used.
Household items:
Anything intact and not electronic can generally be gifted to a second hand store, clothing, furniture, household goods, toys and books.
One of Wellington's many Op-shops. http://www.vinnies-wellington.org.nz/wp-content/uploads/2015/01/Khandallah-Shop-Outside-2015-small.jpg
Clothing:
As well as the Op-shops listed above, there are some places that will take only clothing. Recycled clothing experts such as Rebound Clothing and SaveMart will take all clean clothing, even if it is ripped and useless.
Read here how SaveMart recycles through every step of their business:
Where does our stock come from?
It comes from various sources including:
1.Clothing Bin Contracts,
2.Recylcing Projects,
3.Woollen Mills,
4.Clothing Manufacturers,
5.Carpet Manufacturers,
6.Imports,
7.Surplus Stock,
8.Seconds and Opportunity Stores.
Hundreds of dedicated employees sort the incoming stock in to those items deemed suitable for sale in our stores, only the very best quality makes it onto the shop floor. It is value priced to sell in the same week. Unsold stock is removed after 4 weeks.
All wearable clothing etc that is unsuitable for sale in SaveMart stores is sent to Papua New Guinea where there is great need for clothing especially in the highland villages.
Inevitably there will be garments and material that are not able to be used again as originally intended, these can still be recycled as follows;
Cottons are made into Cleaning Rags, Knitted woollens and acrylic go to India to be made into blankets for relief organisations, Carpet yarn is used in the insulation industry.
Our aim is to recycle everything possible.
The inside of a SaveMart store, full of recycled clothing for sale. http://savemart.co.nz/images/SaveMart_New_Brighton_065.jpg
Clothing Bins can be found in most suburbs throughout Wellington. http://everydaysustainability.info/wp-content/uploads/2015/09/clothing-bin.jpg
As a person who always tries to make the most out of what I have got I tend to accumulate things, I'd like to differentiate between my thriftiness and being a hoarder because I try to use the things I accumulate. I have little containers filled with bits and bobs that I use from time to time. Here are a few examples of the stuff that I have that I hold onto for later use instead of throwing away.
Paper. Empty excercise books, blank paper, coloured paper, I have a pile of all sorts of paper that I can use whenever I need it. I use it to draw pictures, design my next project, scribble on, write lyrics or poems on, anything that I need blank paper for I have it sorted.
Shelf full of assorted leftover paper, to use when I have need.
Scraps of paper. I tend to accumulate scraps of life in the form of paper, whether this be ticket stubs, pictures, words, cards, post cards, photographs, or any number of other beautiful things; I tend to keep them. I have previously organized these onto cork boards, but more recently I have compiled them into a scrapbook. My scrapbook is a way for me to remember many scraps of time in a creative way, I glue all of the different pieces into the book, and then draw and write words around it; I empty my brain of all of the memories associated with that physical piece of my history.
A few open pages of my scrapbook.
Some of the images and physical memories within my scrapbook.
I have old notebooks intended for drawing in. I challenge myself to fill them up, here I get the most crazy images that come from my mind, they are for my eyes only unless I choose to share them, and I get to use the pen and paper in a way that nobody judges. I challenge you to find an old notebook around and to fill it up with ink in anyway that you can.
A Sneak peek from my weird doodling book.
Other Junk: I keep a lot of other junk hidden away for when I need it. I use old containers to store things in. Have a look at this older blog post about storage conatiners for some examples.
As you can tell I try hard to reuse as much stuff as I can, however I am realistic and know when something is at the end of its life and should be recycled or thrown away. The key part is really trying to make things last.
When something reaches the end of its life be sure to recycle it if possible, some plastics can be added to your weekly recycling collection, as can some metals; other metals will need to be recycled by taking them to a scrap dealer, if the metal is worth anything you will also receive payment for it.
As the sun begins to stay around a bit longer and you approach spring cleaning, be sure to minimize waste, re-use and recycle.
For years at my home and again at our flat I've had to slump my guitars in the corner of the room; this gets them out of the way which is good, but there are a couple of downsides to this method is storage, the first being it doesn't look very attractive; The other downside is that when I want to use a guitar I have to lift the other guitars out of the way and try not to clatter them around too much, I fear doing this scratches them and knocks them about which isn't too good for the acoustic guitars which already have a few bumps and scratches.
On my to do list was to create a guitar stand that could house my guitars. I had a source of timber from the pellets I had deconstructed and I began to draw up some plans.
Two small pieces of 4×2 for the base. On top of this will sit two larger pieces of 4×2, these will have the body of the guitar resting in them. Two pieces of 2×2 will stand vertical at the back of the base. One piece of timber will be a back support joining the two 2×2. Lastly six pegs will stick out from the top of the guitar stand to separate the guitars.
Construction started Saturday with Shellie and I building the base. Next we needed to attach he 2×2 but the timber we had was painted an awful blue, ideally the guitar stand will be the colour of natural timber. We decided that I would revisit it the next day.
Sunday a good friend of mine Adam came over, us boys took over my man cave and we set to work. I began to sand the blue paint away but it was taking too long without a belt sander. Adam suggested we try to use his little plane. He brought out the tiniest hand held plane I had ever seen and we took turns stripping the paint off with it. I tidied up the 2×2 by giving it a quick sand. We then proceeded to assemble the guitar stand. When it was time to attach the pegs I struggled to see that they would be sufficient, they appeared as more of an eyesore than anything else.
The scrapings of paint and timber it took off the wood.
The tiniest plane I have ever seen,
Having Adam there brought about many new ideas. The best being to replace the pegs with a piece of timber along he top which could then have five notches cut out of it for the guitar necks to rest in. We ended up attaching a peg at each end and then the timber on top. I then measured and drew on the notches and cut them out with my jigsaw.
I also decided that I would like a place to hang a ukulele. I found some dowel that could hold a uke; I used my drill to create some holes for the dowel, an appropriate space apart for a ukulele to hang, I squirted some glue in the holes and then pushed the dowels inside.
The guitar stand was complete. The next step was to put it in its place in the corner of the room and to decorate it with my guitars. It looked superb once in place. I am absolutely stoked with the way it turned out and I should have done it years ago. The guitar stand completely fills it's purpose, it looks beautiful with the natural wooden tones complementing the other wooden furniture in the room, and it prevents a mess of guitars from forming in the corner of the room.
To use recycled pellet wood to create a beautiful piece of furniture is a great feeling. I have created something out of recycled free timber which many people discard as dirty and worthless. This is what I live for, finding and creating beauty from nothing.
This post is an edited version of a previous post. It started as an urgent plea for help, now I want to use it to share an awesome story and message.
Between Wednesday the 27 of Jan and Sunday the 31 of Jan I took part in RYLA, the Rotary Youth Leadership Award; a leadership course for young people aged between 18 and 24.
One of our challenges was to be the group to raise the most money over a two hour period, the money would go towards an Emergency Response Kit or E.R.K.
Below is the original post
___________________________________________
"
WE HAVE 2 HOURS ONLY!!!
I am taking part as one of seven partaking in the Rotary Youth Leadership Awards from January 27-31.
Rotary NZ has developed and produced Emergency Response Kits (ERKs) to
provide essential supplies to emergency effected households in the
Pacific.
We in New Zealand are the first response to the Pacific when they are hit by Natural disasters. Rotary provided and delivered 900 to Fiji in 2012 and about the same to Samoa in 2009.
One Emergency Response Kit contains the tools to construct a basic shelter, find food from
the land and sea, to allow people to cook and clothe themselves. The empty plastic
containers can hold 90L of water. There are 60+ Items.
One E.R.K. costs
$600 and we have until 2.35pm to raise as much funds and awareness for
these E.R.K.'s as we possibly can so help out team PINK and donate to help
out so we can prepare to help those people in need!
Even $1 counts! Sharing this post helps too!
You can donate via bank transfer or through the Give-a-little page.
PLEASE put the following in your comment:
RYLA 2016 ERK TEAMPINK
Thank you so much for helping towards a great cause!
"
___________________________________________
After making this post my group split off into different parts of Wellington city to raise money any way possible; one of my team members Moni and myself teamed up and went to some workplaces where they sent an email around to all employees. We then found a spot on Cuba St where we based ourselves asking for help from the public in the form of donations and also sharing with them our cause.
What happened next changed my view of people. We had many people who would walk past in a hurry, giving you the cold shoulder. There were people who would say no and continue on with their day. There were people who would ignore you completely, not willing to spare the time just to say no.
Then there were the others. There was an incredible outpouring of generosity from all sorts of different people. Some of them would search the bottom of their wallets for any shrapnel they had, some would quite willingly give a $5, $10, or $20 dollar note. I approached one man who was a beneficiary who spent his evenings in a night shelter for the homeless, he gave me a dollar.
A lot of people honestly had no money to give, but would stop and talk to us; two Fijian ladies asked for more information in the form of an email address and a donations website so that they could then share with their Fijian social group our cause and see if anyone there would donate. One man had no coin to spare but was busy taking photos of the city. He took our photo and gave us his card, we then sent him some information about our cause and he in turn sent us the photo.
This was a very hard challenge for me to do as I absolutely hate asking people for money, but I really appreciated the diversity of people that I encountered. Whether or not they donated or not I appreciated that most people were willing to listen to me.
The E.R.K.'s are an awesome tool. By preparing them in a warehouse in NZ ready to deploy if a disaster does occur somewhere in the pacific we can be ready straight away to help out our pacific island neighbours. New Zealand is a nation of power and responsibility. It is our responsibility to help our neighbours in a crisis.
The link is still live; you can still donate, so if you have a few dollars to spare please thinking of sharing it with this cause. Thank you. rnzwcs.org/donate
This was a cool little project, not a difficult one but one that took some time to do.
It started at a party that was held at our place around four years ago; an unknown girl came along and dropped her bag in the bathroom, leaving it there without any indication of who she was we decided to hold onto it just in case she came back for it.
Inside the bag was a couple of coins and a key. Not much to go on, We never heard from this mysterious person again.
On occasion I have taken the bag out and thought about how it could be of use. My girlfriend tried to use it as a going out bag once or twice, but we realized that the stitching that held it together was breaking.
Recently I've looked a the bag again and seen that it is actually a fairly old leather bag. the stitching looks like the original stitching and is only just getting old enough to break with the pressure of holding it together.
On the inside is a pocket made not of the original leather, and not sewn on, rather, just super glued on.
Upon looking exploring the properties of the bag I came up with a use; I would turn it into my sewing bag. Starting by removing the strap, I will be sewing this to my camp blanket when I get the chance.
For those of you who do not know I have a camp blanket that I love dearly. I have hand sewn everything on there including all of the scarves. Some of the badges I share with my partner in crime Shellie, but a lot of them tell of my scouting journey.
For the bag itself I needed to replace the stitching and that's it. Not a hard task, but a task that needed to be done correctly. I took a trip down to spotlight and bought some brown waxed thread, the last of the roll. I hoped it was enough.
I cut out the old thread with some small scissors and a quick unpick, and explored the three leather pieces that I was left with, very simple shapes, a very simple way to make a bag. Next I sewed them back together with the new waxed thread. Not difficult, but it took a good half hour to do.
There it is.
I sorted all of my sewing supplies out, cotton, needles, badges. And fit them all into my new sewing bag.
I think the difference between myself as a sustainability conscious designer and other people as hoarders, is that I intend to use the things that I collect.
A bag that has sat around for years now being used in a way that is beneficial to me. This has many more years of use left in it.
This week I am lifting content straight from my university work, Yesterday I handed in and presented my first project in the course 'Experimenting with materials'. The project focussed on taking a material and destroying it in order to make something new. Destructive Creation. We worked with physical techniques such as smashing, heating techniques such as melting, and chemical techniques such as rusting. Read on for more.
Heres what Interested me about this project:
Over the course of my university life I have been able to define myself as a designer by what interests me and what I think is important. The two things that this comes down to are
1: D.I.Y., The culture that surrounds it, the practice of doing it, and all of the benefits that go along with that.
2: Sustainability, creating in a sustainable way that does not impact the earth negatively, whether this be recycling old materials, making the most of green spaces, or any number of other things.
Our second lecture of this course was inspiring to say the least. As soon as I saw the calm waves seen of the video below I knew I was watching something special. It contains all things that I love, DIY, Sustainability, Film, Fire, Re-use, and beautiful scenery to name a few.
I'll try not to get too poetic about my feelings towards this video, but I thought two things after watching this video for the first time. 1. Why aren't more people doing this, and 2. I have to do this.
After a small internet search I found a couple of lo-fi, videos showing that people already are doing this on an amateur level.
See the videos here for a gow to turn old plastic into a new and beautiful slingshot.
Needless to say it was my turn to have a go.
I started with a walk on my local beach in Makara.
My girlfriend Shellie and I walked the beach for 40 minutes filling our buckets to the top. There were bottle caps and plastic rope, and all other plastic crap you can think of.
Back at home this is our haul.
Before I could use it it needed to be sorted and washed.
Here is your daily dose of disturbing images.
As seen here, plastic discarded from people everyday that gets washed down rivers and out into the ocean gets mistaken for food by birds such as the three species of endangered albatross (There are a further 19 species of threatened albatross).
In an ideal world everyone would go out into the ocean, or down to the beach, fish out some old plastic, and use that instead of making more new stuff.
I want to work further in the area of plastic recycling, below are some of my experiments.
My first experiment was indoors on a kitchen element. The plastic melted to the extent that it was maleable but still identifiable, this created a vibrantly coloured bottle top pancake.
From this point on I opted for outdoor cooking. Using an open fireplace would give me a more intense heat, and being outside meant I wouldn't need to worry about getting bad smells throughout the house. My second attempt created a large creen/grey sheet, solid, yet able to be cut into pieces.
My next piece comprised two seperate cooks merged together, the first was perfect, using colourful plastic ropes. The second was awful, it burnt and turned to charcoal, I had used a rubbish grade of plastic. However, I was still able to chop and drill into the block.
Now I would focus my experiments a little more.
My first focussed experiment. Melting milk bottles into a goo I poured it into a cubic mould. Once cooled and removed from the mould it was scalded on the outside, once sanded away it unveiled the light coloured marbling seen here.
The next experiment was melted to extreme heats to the point that the plastic turned to liquid. The molten plsatic was poured into a mould and after bubbling, cracking and eventually setting and cooling I took to it with a band saw, exposing these brilliant marbling patterns.
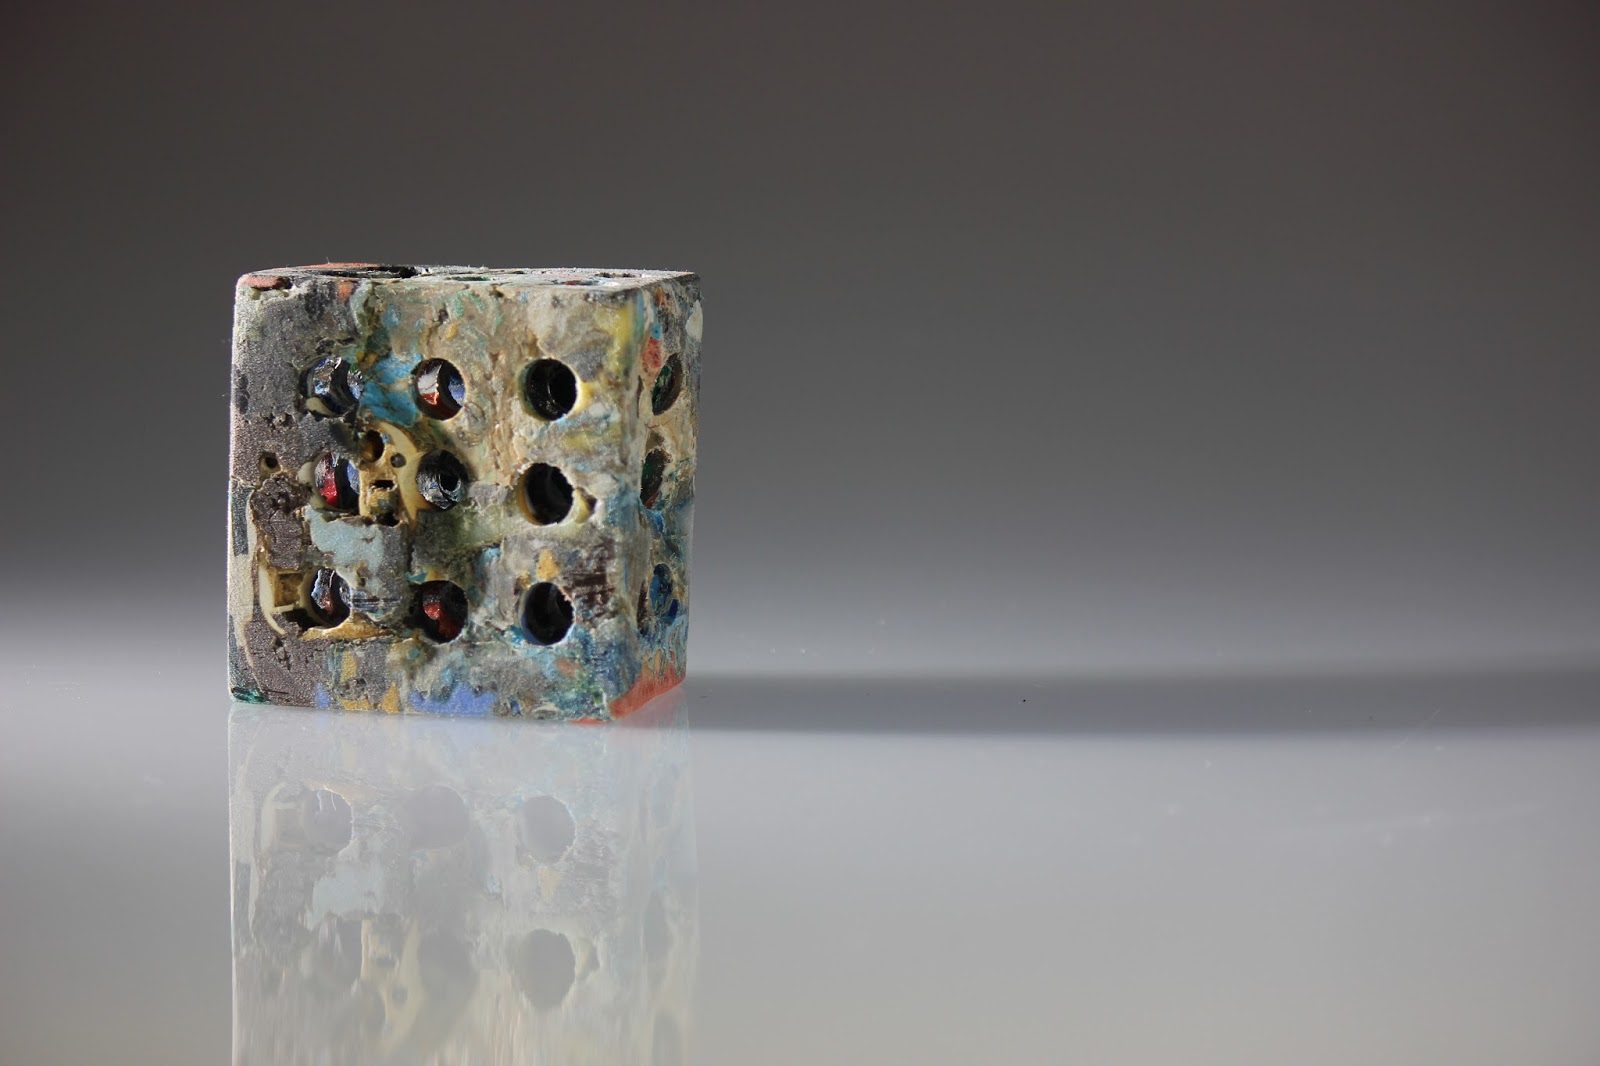
My final experiment had colour. Vibrant colours that I wanted to bring out and expose. By drilling through it I exposed the colours hidden in the center.
Although it does just look like a block with holes in it, that isn't the point. The point is that by creating your own plastic mould you can create anything. Any shape that you can come up with has the potential to be made out of the rubbish found on the beach.
It's easy. It's simple. It's plain reckless not to do it. Taking your own re-useable bags to your local countdown, new world, pak n' save or wherever else you buy groceries. I'd like to say this has become the norm. It hasn't. The majority of people still turn up to the supermarket once a week without their own bags and in turn put another 20 plastic bags into our local landfill weekly.
The energy to create a re-usable bag is estimated to be equivalent to the energy to create 28 plastic bags. Therefore to have any environmental impact you need to use your re-usable bag 28 times, is that right? Wrong. If you can use your own old fabric to create shopping bags out of, then each time you use your bag you are stopping another plastic bag from being used. Fantastic. Making you own bags is easy. Use some old fabric, sew a couple of seams up, and voila you have a bag that you can use and use and use again.
Wine in a homemade bag, made from an old couch throw.
A lot of people seem to think that bringing their own bag is a hassle and not worth the effort. The reality is, If everyone used their own bags instead of plastic we would be producing far less waste than we currently do. Leave your bags in the car, and use them again each time you shop.
If I just sound like a random blogger whining about plastic bags, watch the video below and then see if you are swayed.
As Tim Minchin says "Do something drastic to rid the world of plastic". On a side note, I'd also like to discourage the purchase of fruit and veg that is wrapped in styro-foam and plastic. Is there anything more unnatural that we could do to disguise the things we consume?
I know that sometimes it is hard to refuse a plastic bag, and sometimes your things are bagged before you have a chance to refuse; in situations like these, it isn't worth the hassle to make a scene and draw unwanted attention to yourself. Instead, take the bag, but use it. Make sure its life is one of use.
Don't just bin it, there are heaps of things plastic bags can be used for, it can store your loose belongings, like jigsaw pieces, or lego. It can be used to store fruit, or used as a means of battering your potatoes and other veg in tasty herbs and spices. And of course, it can house other pieces of rubbish, I admit it, I still bin things, what else do I do with all of that belly-button fluff? An old plastic bag can still do good if it contains other objects that are inevitably headed toward the landfill.
Plastic bag as a rubbish liner, to contain all other waste.
If you have read my manifesto you'll know that I am an advocate for buying good stuff. Believe it or not plastic can be good stuff. Using lunchbox quality plastics can be more beneficial to the environment than using cheap plastics that will crack, shatter, and be thrown away.
At chinese fast-food outlets the plastic that your chow mein comes in is rubbish. One use and it is bust; but lunchbox plastics bought at any supermarket could last more than a decade with the right care.
Good re-useable lunchbox, containing porridge for breakfast.
I have recently been suggested the idea that instead of using plastics from a chinese fast food store, or even the plastic at supermarket pick n mix, I should instead take my own containers and keep on re-using those.
A decent plastic container can be used for many things. I use them to hold my lunch, to store foods, and objects around the house, and recently for even more sustainable food shopping. Of course they are only a great tool so long as they do not break; a lot of love must go into all items, even plastics to ensure that they survive a long time.
As my birthday is approaching in less than a month I have naturally thought of a few gift ideas. One of the items on my wish list is a guitar pick cutter which cuts old credit-cards into guitar picks. Brilliant way to give a piece of plastic some new life. Especially seeing as I am always losing picks. This nifty item will save on pick costs, enable some creative license when deciding on my pick colouring, and breathe new life into the many expired credit cards which nowadays people chow through.
http://www.pickmaster.co.uk/
Lastly this week I am to talk about something somewhat disappointing to a Wellingtonian like myself. The Wellington Hurricanes were favourites to beat the Otago Highlanders in the Rugby Super 15 final. As I am not the gambling man the extent of my wager was that the winning team decided the beer that would fill my next crate. The bottles that make up a crate are a brilliant example of re-use that is not only environmentally sustainable, but also economically friendly. The first time you buy a crate of beer you pay an extra 5 dollars for your crate and bottles, every other time after that you are saving money by swapping the bottles in. These bottles in turn just get sterilized and then refilled with beer. As my team lost my next refill will be a southerners drink. Speights.