Wednesday, 26 October 2016

We Made a Veggie Garden!

Labour day brings us a Monday of work off and an excuse to either blob and do nothing for an extra day or to jam pack our weekend full of all of the things that we wish we had time to do but generally don't.
My fiancee Shellie and I chose the latter.
We like being busy creating things or going on adventures throughout our city and country. We decided Saturday we would wake up early and get straight to work in making a vegetable garden.
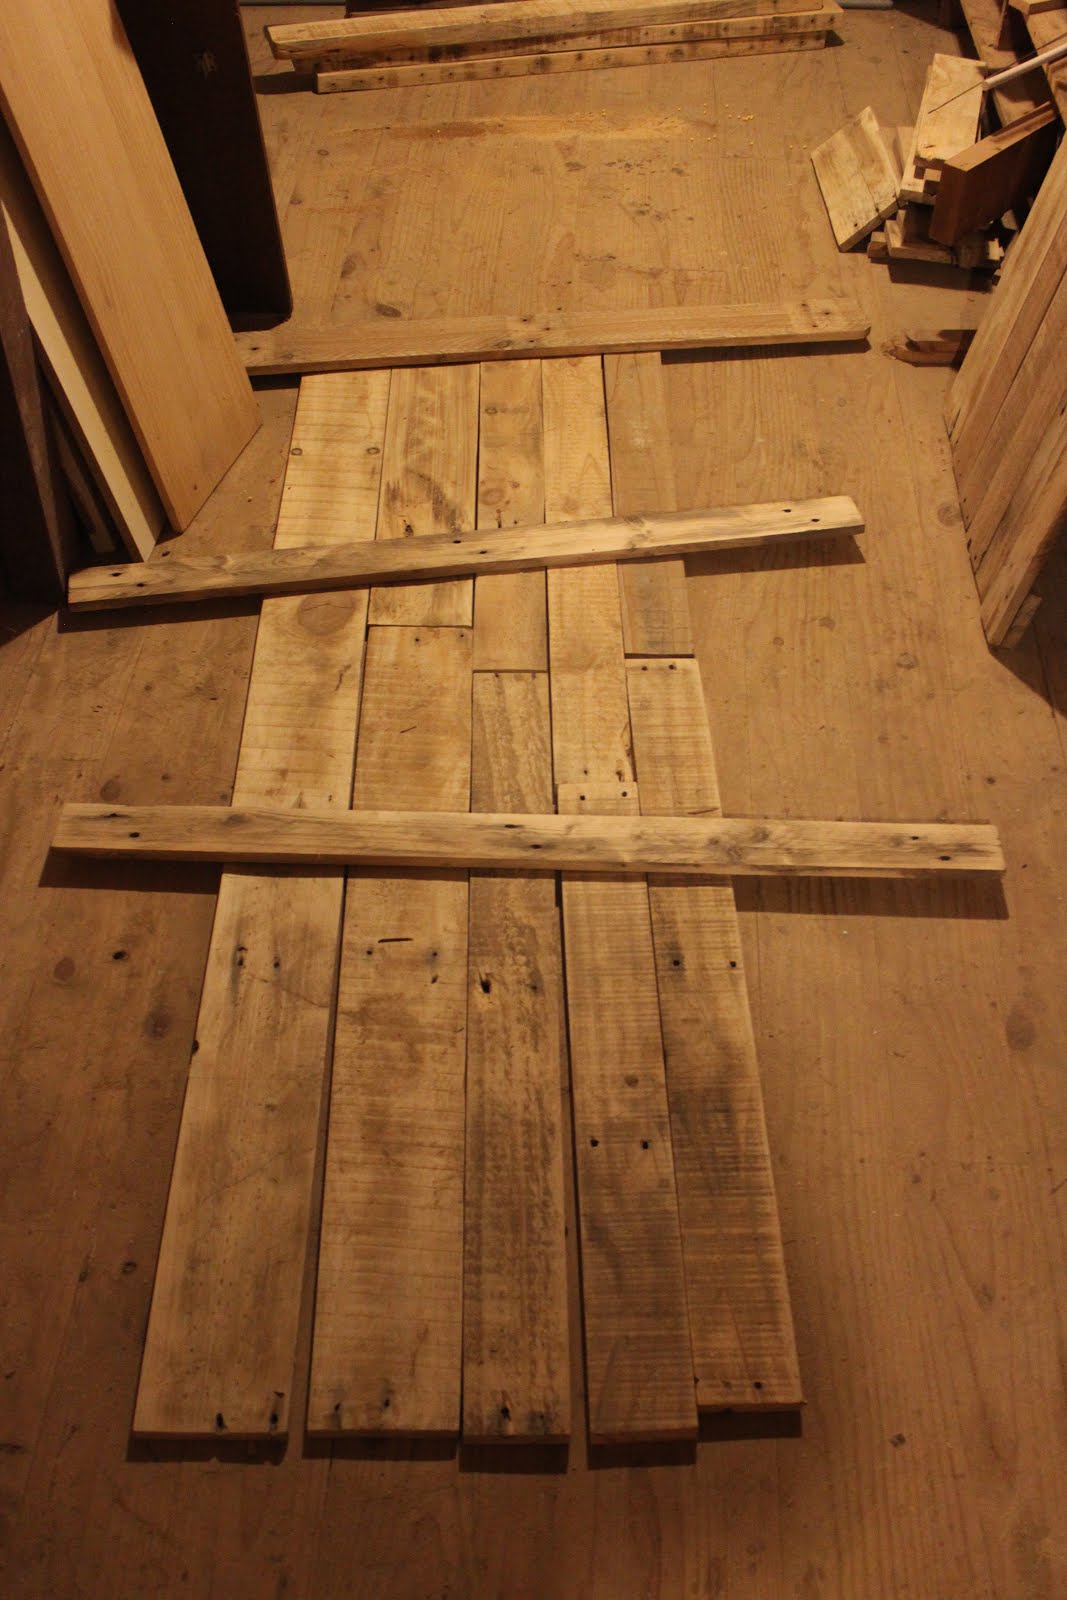
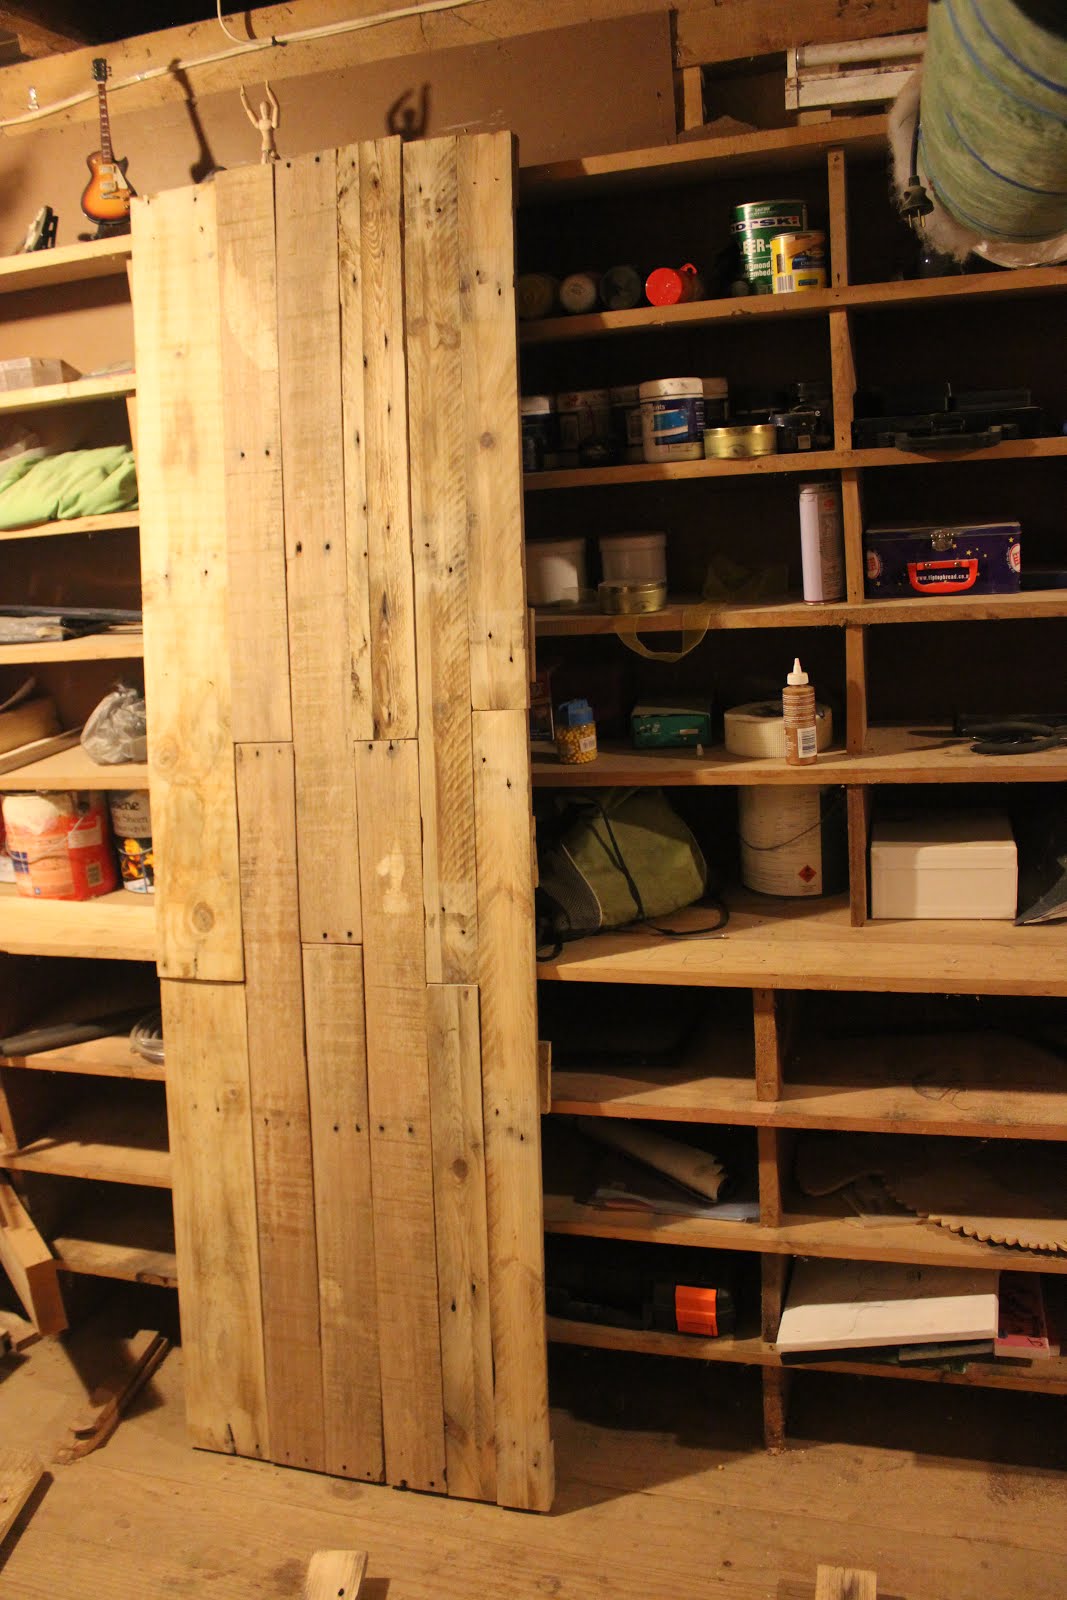
The basis of the garden; old pallet timber
We salvaged the old pieces of pallet timber from around the property to construct a box that would provide the basis of our garden.
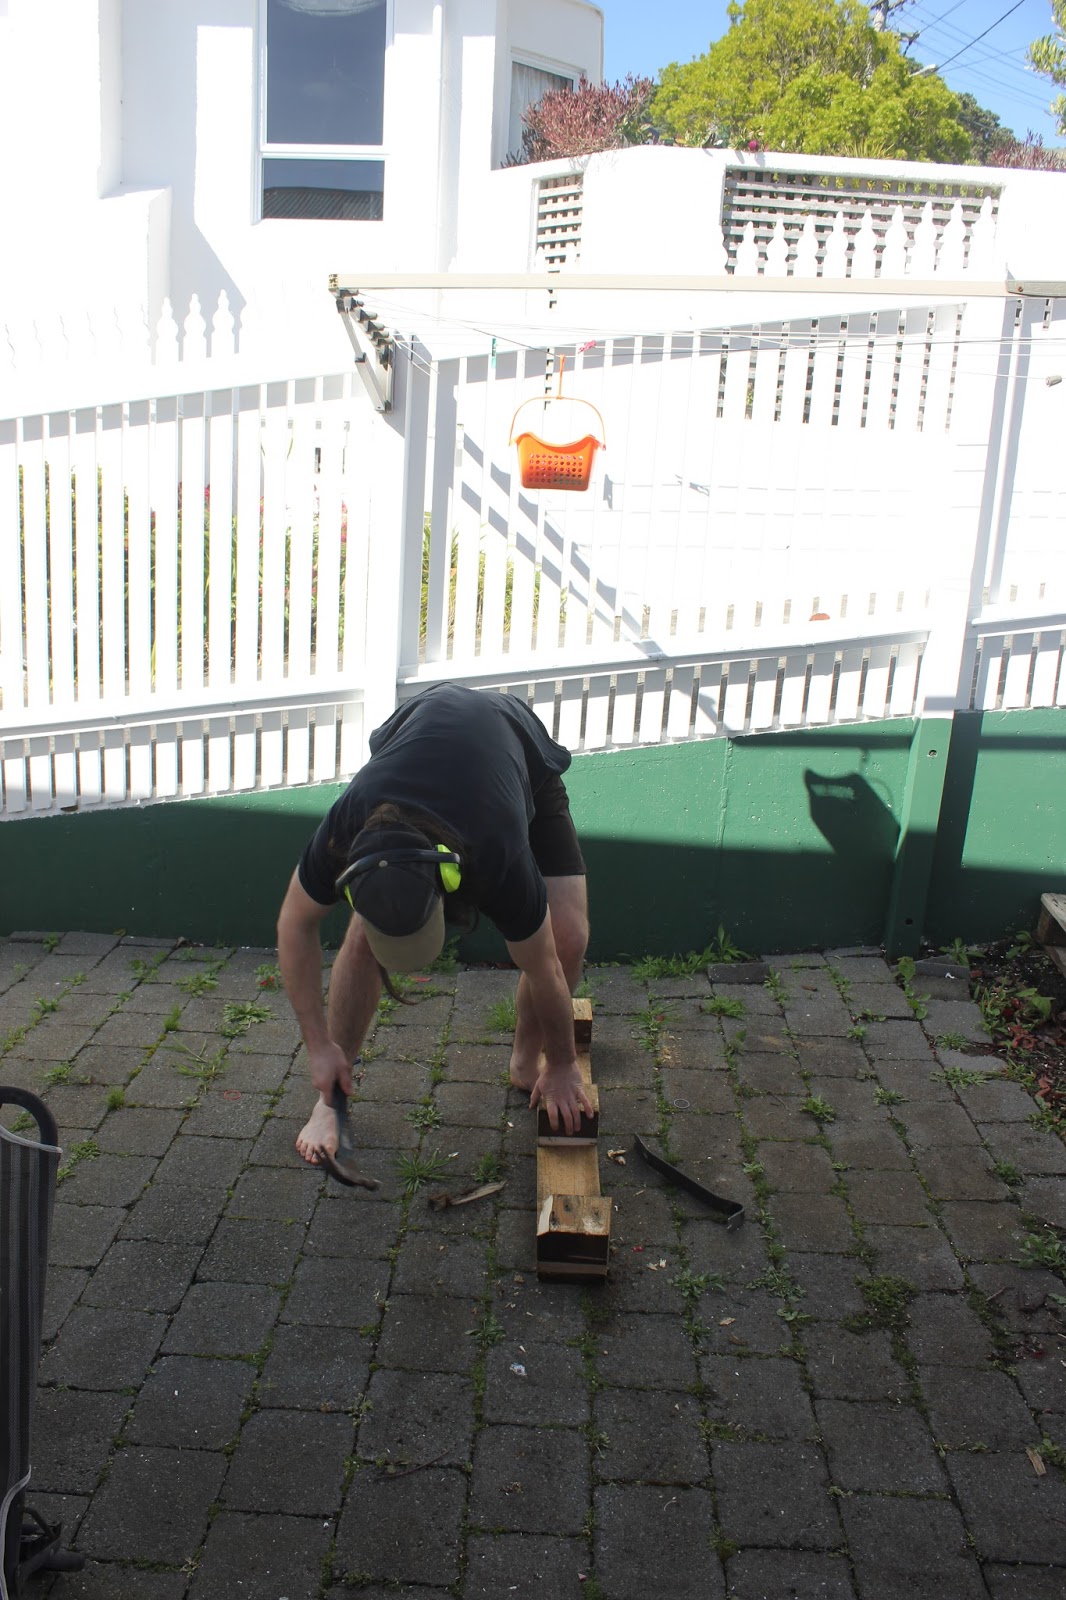
Take note ladies, you too can get stuck in.
I had a simple design for a box in my mind and between us we brought it to life, we each wielded a hammer and got to work creating the box.
Wood slats on the bottom
Seeing as we were to put our new garden straight onto the lawn I decided that putting a bottom on it would contain the soil and plants in the box and also keep weeds from outside of the box from getting in.
Salvaging wood from old pallet scraps.
 We didn't have quite enough pieces of timber the right length to cover the entire bottom so I had to deconstruct some other pieces of pallets I had around to get all of the pieces needed.
The bottom covered
Giving the box the bottom not only acts as a container for the soil and plants, but also gives the rest of the box strength, by pulling it all together.
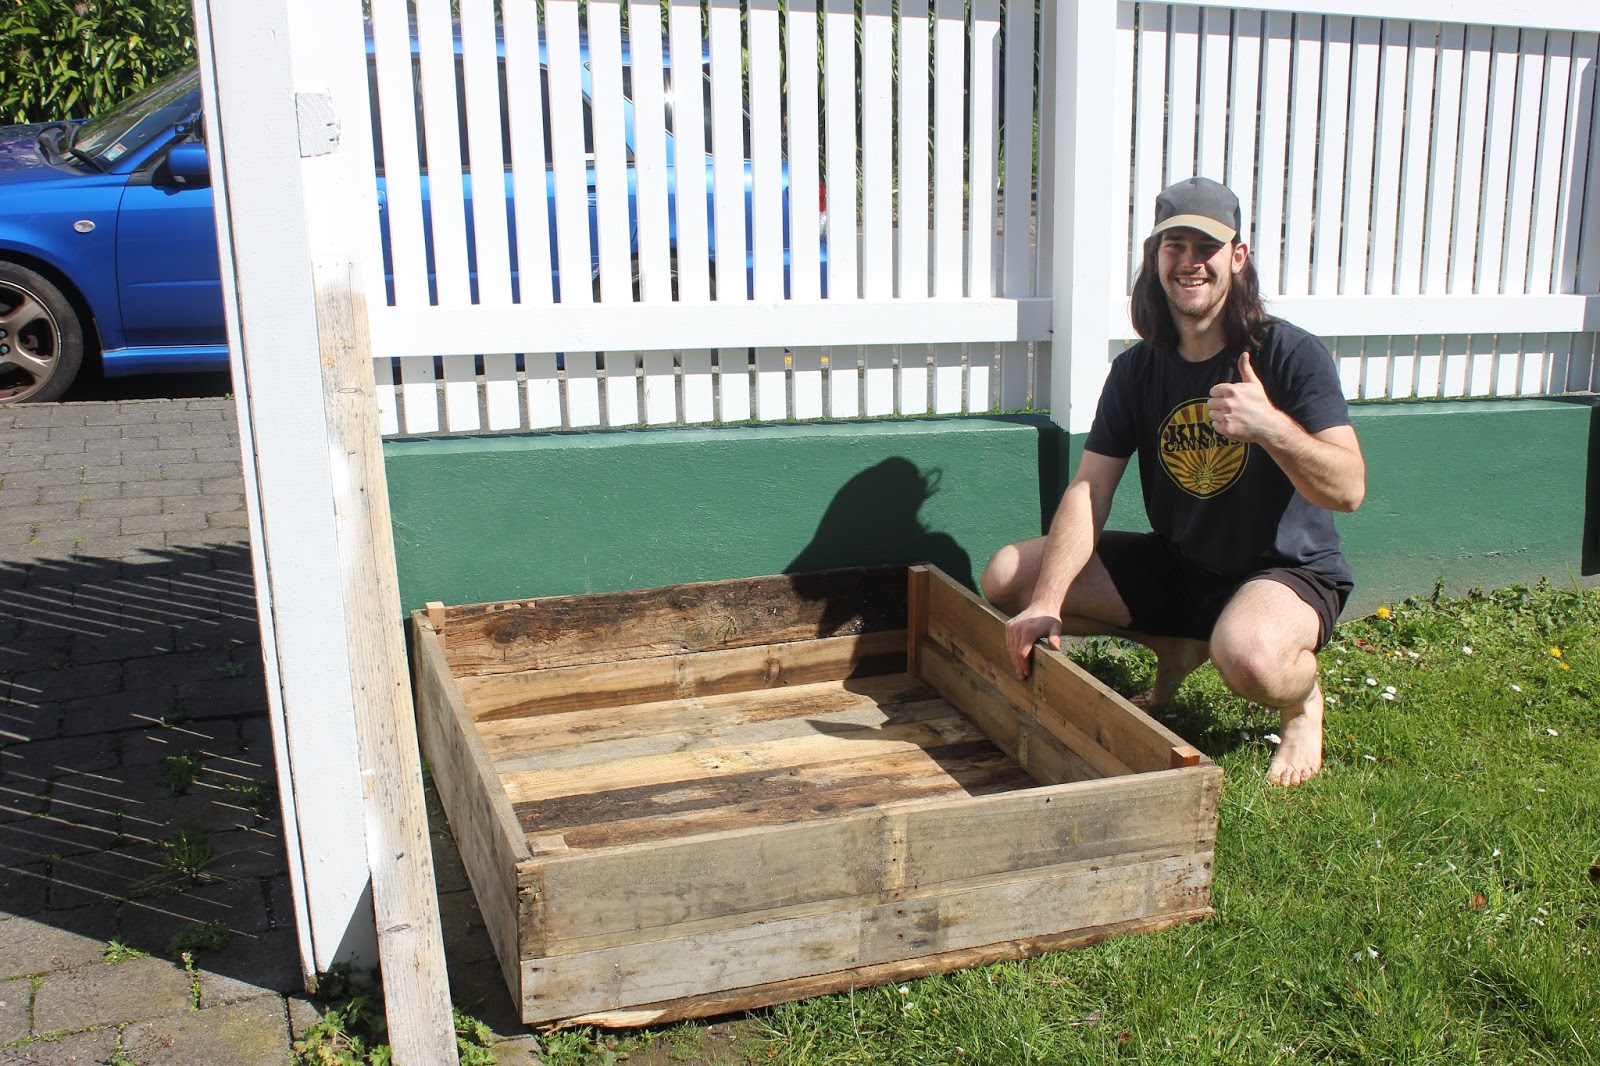
Our finished box
 The morning's job was over, we had completed the box construction, after lunch we would get to planting some veggies.
The garden box in its final resting position, unobtrusive and situated for morning sunshine.
We have been flatting in Wadestown at the forge, for the better part of this year, and have consistently been adding to a compost bin that was here on the property when we moved in. Over the course of six months we have been adding our food scraps and grass clippings to the compost bin and given a mix every now and then. The result of six months of being fed and breaking down, is beautiful soft soil that can now be used for our garden, hopefully to yield a good bunch of vegetables (at least enough for a salad).
The black compost bin stays out of the way
Inside is a mix of soft soil and the plant matter that will break down into it.
It took a few trips of carting buckets back and forth from the compost bin to our garden in order to fill it up. It also became hard to dig the soil out from the bin, fortunately these compost bins do not have a bottom so they can be pulled up and over from around the soil, this made things a lot easier.
The box filled with soil and divided into 9 equal sections.
By dividing the garden into sections we made it easier to keep track of the plants we will plant, one square for each species.
Constructing a frame for bean vines to climb
We had purchased some bean plants which grow in the form of a vine, in order for these to grow properly we had to construct a frame which could then have string hanging from it.
Stringing the frame so the plants can climb up
We planted a bunch of different plants including beans, tomatoes, carrots, capsicum, cucumber, lettuce, and also marigolds. The marigolds are said to repel moths and other insects; hopefully this means that when our vegetables grow they will not be eaten by bugs but be in tact for when we want to eat them.
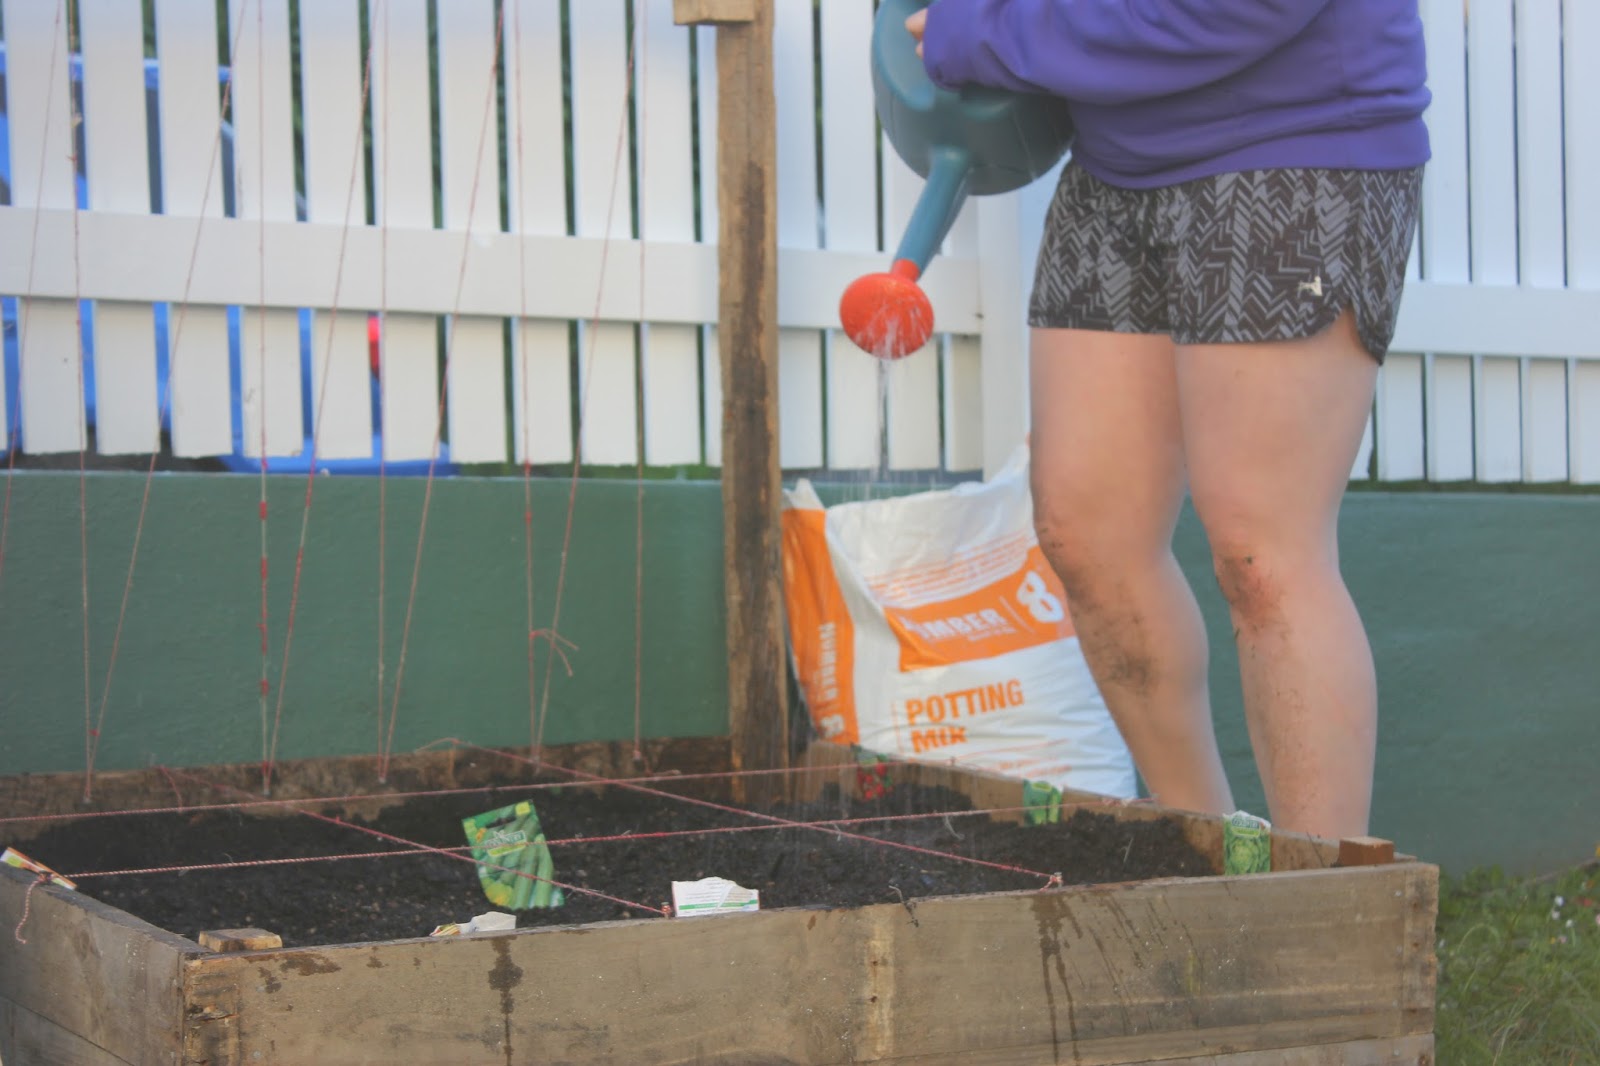
Watering our plants for the first time.
We watered all of our plants for the first time, something we will continue to do, especially on hot summer days. Watering is best done at dawn and dusk, when it is the right temperature to allow the plants to absorb the water without the sun evaporating it.
Gardener Jayden: American Gothic impression
And of course, the best way to celebrate a job well done is by posing in a few silly photos. Behind these two silly poses I was sincerely stoked with what we had accomplished in a day. It is about time I starting taking part in gardening, something I think is so central to sustainable living.
Gardener Jayden: Rocking out with a rake.
Gardening is a fantastic hobby to have. It requires hard work, care, and patience. Just like hunting and farming it allows people to appreciate where their food comes from. Through consistent care of your garden you will reap the benefits of nutritious food to sustain your own body; you will also know exactly what has gone into the soil to create your food, it is your decision whether or not you use pesticides or fertilizers to enhance your plants growth (ideally not), I believe a garden needs good soil, plenty of sunlight and a little bit of water to encourage the best growth.

That's it.

Put simple things in to get the best things out. I hope. I'll tell you how it works out at the end of summer.

Monday, 17 October 2016

Spontaneous Table Construction

The weekend just been has been a weekend of laziness and recovery.
My fiancee Shellie and I headed up the island on a road trip to Napier with our good friend Liv, we shared the weekend with friends and did activities that required little effort and encouraged the recovery of the body and mind. Sleeping in past 8.00AM; eating good food in supurb locations; Relaxing our joints and muscles at Ocean Spa; and sharing a couple of cheeky beers.
A Picnic Lunch at White Pine Bush with friends.
Sunday lunch was roast chicken, and while that was cooking I noticed a pile of timber, old bed slats from a broken bed. I asked our host Terry what we could do with it, make a chair? a table? a stool?
Broken bed and the timber slats that we recycled.
Terry had been meaning to do something with the wood for some time, my prompt was the kick up the bum that he needed to do it. A plumber by trade, he had all of the tools required for most home DIY projects. He decided on making a coffee table to sit on the deck, perfect for coffee and other beverages to rest on while we enjoy the summer sun in Napier. 
The table top with one edge holding it together.
We cut six of the old bed slats down to size to make the table top and then cut four more pieces to hold them together as edging. Terry's tools were Makita brand, they took some getting used to, as they have subtle differences to my Ryobi brand tools. The Skill saw had a different safety catch and it took some time for me to line each cut up as I had to figure out where to line the saw with the cut. This goes to show that every handyman has their preferred tools and each tool has its own subtle differences.
The self drilling screws used pulled the table together snug and strong.
The four edge pieces pulled the table top together, the final step was to create legs at the desired height for the table. Terry decided on using an excessive eight pieces of wood to create an L shape in each corner that would hold the table together rigidly. I thought four pieces would be sufficient but Terry was determined.
Terry with the near finished tabletop.
Whilst attaching the leg pieces Terry drilled the pieces together while I held the table tightly to ensure all pieces fit together correctly
The finished table
This small project took us around 90 minutes to complete, we enjoyed having a project to do, it cleared up the mess of the broken bed and transformed it into something beautiful and practical. We enjoyed the Sunday sunshine and when we were finished the chicken was cooked and it was lunch time.
Liv and Shellie enjoy each others company and the presence of the new table.
Construction projects don't have to take a long time, and I am finding more and more as I continue to practice my skills and improve it takes less time to build things.

Construction is a great hobby to get into; it uses your body in a physical way, allowing you to develop your gross and fine motor skills and your hand/eye co-ordination.

Through physical construction you make things, an end product, ideally something useful that can make someone's life a little bit better.

Construction encourages cultures of sustainability and recycling, making the most of all of your resources to ensure minimal waste is left behind.

Construction also strengthens relationships, Terry and I have bonded as mates through building something together, and now other people can stregthen their relationships with each other by enjoying each others presence whilst using the new drinks table.

Thursday, 6 October 2016

Don't throw out! Use, Store, or Donate.

When it comes to spring cleaning and getting rid of all of the junk that you no longer use take a moment to consider where you might be able to send that stuff before concluding that it is rubbish doomed to a landfill. Also in your everyday dealings with waste consider these alternatives that are more environmentally friendly.
Getting started with the spring cleaning.
Appliances:
Old appliances when no longer useful or obsolete tend to take up space in a house. I still have an old Apple I-mac I am holding on to for no good reason. Some appliances still have value and it is easy to sell them on websites such as http://www.trademe.co.nz/ or in shops such as Cash Converters. If someone else can make use of it and you can profit from it then why not?

If that doesn't work you can try giving it away for free on websites such as https://nz.freecycle.org/. Here people give objects they don't want and take objects that other people no longer need. This website encourages re-purposing of everything from televisions and keyboards to glass jars and microphone stands.
Apple Imac. Taking up space and not being used.
Household items:
Anything intact and not electronic can generally be gifted to a second hand store, clothing, furniture, household goods, toys and books.

You can find your local Salvation Army Family Store here.
You can find your local SPCA Op Shop here.
You can find your local Wellington Vinnies Opshop here.
You can find your local Wellington Mary Potter Hospice Shop here
One of Wellington's many Op-shops.
http://www.vinnies-wellington.org.nz/wp-content/uploads/2015/01/Khandallah-Shop-Outside-2015-small.jpg
Clothing:
As well as the Op-shops listed above, there are some places that will take only clothing. Recycled clothing experts such as Rebound Clothing and SaveMart will take all clean clothing, even if it is ripped and useless.

Read here how SaveMart recycles through every step of their business:

Where does our stock come from?
It comes from various sources including:
1.Clothing Bin Contracts,
2.Recylcing Projects,
3.Woollen Mills,
4.Clothing Manufacturers,
5.Carpet Manufacturers,
6.Imports,
7.Surplus Stock,
8.Seconds and Opportunity Stores.

Hundreds of dedicated employees sort the incoming stock in to those items deemed suitable for sale in our stores, only the very best quality makes it onto the shop floor. It is value priced to sell in the same week. Unsold stock is removed after 4 weeks.

All wearable clothing etc that is unsuitable for sale in SaveMart stores is sent to Papua New Guinea where there is great need for clothing especially in the highland villages.

Inevitably there will be garments and material that are not able to be used again as originally intended, these can still be recycled as follows;

Cottons are made into Cleaning Rags, Knitted woollens and acrylic go to India to be made into blankets for relief organisations, Carpet yarn is used in the insulation industry.

Our aim is to recycle everything possible.
The inside of a SaveMart store, full of recycled clothing for sale.
http://savemart.co.nz/images/SaveMart_New_Brighton_065.jpg
Clothing Bins can be found in most suburbs throughout Wellington.
http://everydaysustainability.info/wp-content/uploads/2015/09/clothing-bin.jpg
As a person who always tries to make the most out of what I have got I tend to accumulate things, I'd like to differentiate between my thriftiness and being a hoarder because I try to use the things I accumulate. I have little containers filled with bits and bobs that I use from time to time. Here are a few examples of the stuff that I have that I hold onto for later use instead of throwing away.

Paper. Empty excercise books, blank paper, coloured paper, I have a pile of all sorts of paper that I can use whenever I need it. I use it to draw pictures, design my next project, scribble on, write lyrics or poems on, anything that I need blank paper for I have it sorted.
Shelf full of assorted leftover paper, to use when I have need. 
Scraps of paper. I tend to accumulate scraps of life in the form of paper, whether this be ticket stubs, pictures, words, cards, post cards, photographs, or any number of other beautiful things; I tend to keep them. I have previously organized these onto cork boards, but more recently I have compiled them into a scrapbook. My scrapbook is a way for me to remember many scraps of time in a creative way, I glue all of the different pieces into the book, and then draw and write words around it; I empty my brain of all of the memories associated with that physical piece of my history.
A few open pages of my scrapbook.
Some of the images and physical memories within my scrapbook.


I have old notebooks intended for drawing in. I challenge myself to fill them up, here I get the most crazy images that come from my mind, they are for my eyes only unless I choose to share them, and I get to use the pen and paper in a way that nobody judges. I challenge you to find an old notebook around and to fill it up with ink in anyway that you can.

A Sneak peek from my weird doodling book.
Other Junk: I keep a lot of other junk hidden away for when I need it. I use old containers to store things in. Have a look at this older blog post about storage conatiners for some examples.

As you can tell I try hard to reuse as much stuff as I can, however I am realistic and know when something is at the end of its life and should be recycled or thrown away. The key part is really trying to make things last.

When something reaches the end of its life be sure to recycle it if possible, some plastics can be added to your weekly recycling collection, as can some metals; other metals will need to be recycled by taking them to a scrap dealer, if the metal is worth anything you will also receive payment for it.

As the sun begins to stay around a bit longer and you approach spring cleaning, be sure to minimize waste, re-use and recycle.

Monday, 8 August 2016

Outdoor Furniture

As winter approached our Rover crew were able to sell off all of our firewood supplies, this freed up the pallets that were keeping the wood off the ground and dry. Back at the forge we sit through winter shivering and dreaming of the warm sun and how summer is going to be incredible with parties, BBQ's, outdoor fires and good company. We also discussed having some nice outdoor furniture to use and make use of our outdoor courtyard.

I took to the pallets in Makara, seperating the individual panels so they could fit in the car, and then driving them back to the Forge. I spent an evening removing the nails from the timber. Outdoor furniture is going to be exposed to the elements, so it does not need to be sanded down perfectly.
Piles of timber, de-nailed and ready to use.

One afternoon I jumped on the scooter and headed around to Mitre 10 around the corner, I returned with some nails, and set to work designing a simple chair. I drew some doodles and set out to work.
The chair was designed to be very square, I nailed 2x4 legs to 2x2 braces, and lastly nailed slats to the chair frame give the user some thing to sit on and then to lean against. It looked terrible. It was chunky and ridiculous.

The next day, I disassembled the chair and amended it. Using my skill saw I ripped the 2x4 pieces into two 2x2 pieces, I then trimmed them to make the chair shorter and reassembled. The chair, although a little wobbly, looked good, proportionate.
A couple of easy simple chairs.
A few days later I decided to make another chair, this time opting straight for the 2x2 legs. The result was a chair that looked the same but was somewhat stronger.

Table top Pallet, with a bit of work to do.
My recycled timber was left sitting in the courtyard for me to look at and ponder how I could use it. I had a large piece of a pallet that wasn't completely disassembled, the flatmates and I thought it would make a good table, so in my mind I tried to design it as a beautiful centerpiece. I decided to line the edges with 2x2 which I measured and cut to fit and then nailed to the main piece. I then used 4x2 to create four legs which I measured and cut to about knee height. When these were firmly attached the table was strong, with very little wobble to it.
The flat mates seemed to enjoy the new furniture.

That is a good start to the flats free, recycled, outdoor furniture. It looks good, it works well, and come summer it will be the envy of the neighborhood.

 The Sunday night after I'd made the table was a cold night but I wanted to light a fire, I lit the brazier, poured myself a drink, and Shellie my fiancee joined me for dinner outside. We were warm, and we enjoyed our furniture. We sat on the chairs and we could sit our bowls on the table. We then roasted a few marshmellows for dessert. Yum. Come summer, this will be a weekly occurrence; we'll be able to fire up the BBQ and enjoy food, drink, and good company in the sun.

Furniture, fire, music and food. A good night under the stars.

Monday, 20 June 2016

Building a Wardrobe.

When we moved into our flat in Wadestown, Shellie and I claimed a large bedroom, the only problem was it didn't have any storage space. For the first while it was quite a mess. We moved a couple of shelving units into a spare bedroom down the hall and hung all of our clothing in a wardrobe down the hall that wasn't being used, this was less than ideal but worked nonetheless.

In the months following I came up with ideas on how to optimize the space in our bedroom and to contain our stuff. One of these ideas was to build a wardrobe that would live in our room and not down the hall.

Over the next few weeks I constructed a wardrobe that would fit our needs. It would be over 1 meter wide and tall enough to house two bars full of clothes.

I had the help of my friend Adam, and Shellie also helped out.
1900mm X 600mm.
One solid wall piece.


After completing construction of the guitar stand Adam and I set to work on creating the wardrobe walls. Using sanded down pallet wood we measured and cut the timber, laying it out so it was 1900mm tall and 600mm wide. We used five other pieces of timber to screw to the laid out pieces, thus forming one solid wall piece. This was harder than we initially assumed it would be as our pallet timber was imperfect, bowed slightly in places, and not all the same thickness, this meant an inventive and rough technique was needed to force the timber together in places before screwing it all together so that it aligned neatly.

Over the next few weeks I finished off the second wall; I cut in half a steel beam to create two smaller beams of even length; and I made both a top and bottom base which the two walls would sit in and be attached, this I achieved by nailing four 4X2 pieces together much the same way as I had for the guitar stand.
Before lining it all up I used my jigsaw to cut out gaps where the two beams could slot in; this was an error of judgement as I hadn't made an allowance for the top base which had an overhang that covered the gap. This cost me time in cutting a new piece of timber and a new gap.

Lining it all up


Top base overhanging the gap for the beam.
Before nailing the walls to the bases and constructing the wardrobe as a complete piece of furniture I needed to make it pretty and safe. A lot of the screws I had used were longer than the wood was thick so they stuck out dangerously. Being the safety buff as I am I needed to find a way to remove them. I called Adam over and he provided me with an angle grinder which he taught me how to use. The two of us took turns removing any sharps from the two walls, using the correct protective gear. Safety glasses for our eyes and earmuffs for our ears. The grinder is a dangerous tool and we had to clear the area from anything that could catch on fire from the sparks, a perk of having a friend who is a volunteer fire fighter in has spare time.
Adam taught me how to use the Angle Grinder


We removed sharps from the two walls.


We cleared the works bench of things that could catch on fire.
That evening I brought the pieces of wardrobe into the bedroom, I couldn't construct it elsewhere in the house as it wouldn't fit through the hallways very easily. Shellie helped to hold the walls steady while I nailed the pieces together. when the box was completed with the two bars inserted into their gaps I assessed the wardrobe, it had quite a bit of movement, so I cut and sanded down two braces to cross the back of the wardrobe, these stabilize the whole wardrobe, stopping excessive movement.

Shellie helped me by holding the walls still.
The two back braces stabilized the wardrobe.


The finished wardrobe fit the corner of our room snugly. The next night I took delight in filling it with our clothes. Now we no longer have to walk the length of the house to pick out the next days clothes. 
Our new wardrobe filled with clothes.
Creating a wardrobe from nothing but pallets was an exciting opportunity to learn some new D.I.Y. techniques, to learn how to use tools I haven't explored before, and to add another piece how furniture to our room that tells a meaningful story that purchasing an ugly plastic rack never could. By reworking old materials into something new I am adding my work and my daily life to the wardrobe. I am creating a new history for materials that already have a prior history, to me that is fascinating.

I don't know exactly where this timber came from originally but I can decide where it will end up after I am finished using it during my time flatting. Likely it will be used again as a wardrobe by someone else, taking with it the history of its creation and my use of it.

Wednesday, 4 May 2016

Guitar Stand

For years at my home and again at our flat I've had to slump  my guitars in the corner of the room; this gets them out of the way which is good, but there are a couple of downsides to this method is storage, the first being it doesn't look very attractive; The other downside is that when I want to use a guitar I have to lift the other guitars out of the way and try not to clatter them around too much, I fear doing this scratches them and knocks them about which isn't too good for the acoustic guitars which already have a few bumps and scratches.

On my to do list was to create a guitar stand that could house my guitars. I had a source of timber from the pellets I had deconstructed and I began to draw up some plans.

Two small pieces of 4×2 for the base. On top of this will sit two larger pieces of 4×2, these will have the body of the guitar resting in them. Two pieces of 2×2 will stand vertical at the back of the base. One piece of timber will be a back support joining the two 2×2. Lastly six pegs will stick out from the top of the guitar stand to separate the guitars.

Construction started Saturday with Shellie and I building the base. Next we needed to attach he 2×2 but the timber we had was painted an awful blue, ideally the guitar stand will be the colour of natural timber. We decided that I would revisit it the next day.


Sunday a good friend of mine Adam came over, us boys took over my man cave and we set to work. I began to sand the blue paint away but it was taking too long without a belt sander. Adam suggested we try to use his little plane. He brought out the tiniest hand held plane I had ever seen and we took turns stripping the paint off with it. I tidied up the 2×2 by giving it a quick sand. We then proceeded to assemble the guitar stand. When it was time to attach the pegs I struggled to see that they would be sufficient, they appeared as more of an eyesore than anything else.


The scrapings of paint and timber it took off the wood.

The tiniest plane I have ever seen,


Having Adam there brought about many new ideas. The best being to replace the pegs with a piece of timber along he top which could then have five notches cut out of it for the guitar necks to rest in. We ended up attaching a peg at each end and then the timber on top. I then measured and drew on the notches and cut them out with my jigsaw.

I also decided that I would like a place to hang a ukulele. I found some dowel that could hold a uke; I used my drill to create some holes for the dowel, an appropriate space apart for a ukulele to hang, I squirted some glue in the holes and then pushed the dowels inside.


The guitar stand was complete. The next step was to put it in its place in  the corner of the room and to decorate it with my guitars. It looked superb once in place. I am absolutely stoked with the way it turned out and I should have done it years ago. The guitar stand completely fills it's purpose, it looks beautiful with the natural wooden tones complementing  the other wooden furniture in the room, and it prevents a mess of guitars from forming in the corner of the room.


To use recycled pellet wood to create a beautiful piece of furniture is a great feeling. I have created something out of recycled free timber which many people discard as dirty and worthless. This is what I live for, finding and creating beauty from nothing.